Armor
All vehicles have armor, which protects them from enemy fire. Some vehicles are heavily armored and others are less shellproof, yet the armor on most vehicles follows a common principle: the front armor is usually thicker, while the sides and rear are more vulnerable. Hull armor thickness is measured in millimeters. In vehicle characteristics, these values are displayed as front/side/rear armor. If a vehicle has 75/45/45 mm hull armor, a shell with a 60 mm standard penetration will pierce its sides and rear (assuming a direct hit), but will not penetrate the front.
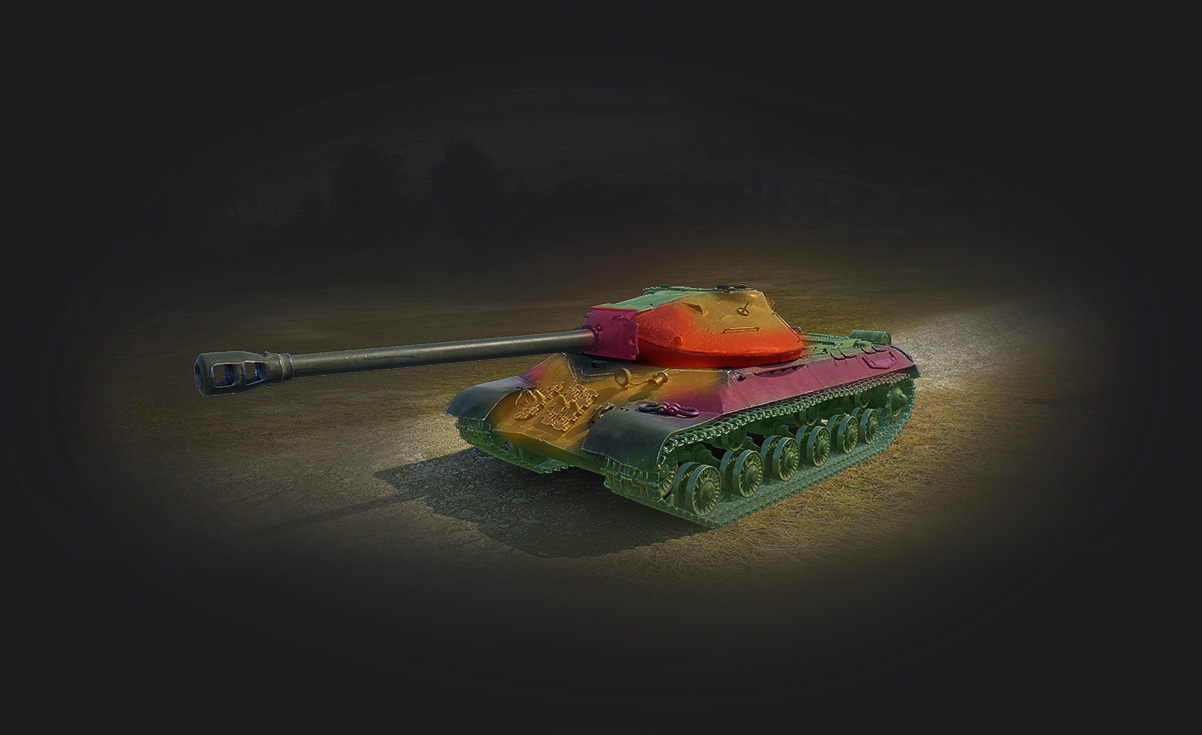

IS-3 armor scheme. The variations of color represent different values of armor thickness in millimeters.
Apart from side and rear armor, most vehicles have common weak spots: the lower glacis plate, the commander’s cupola, and the top surface of the turret.
Armor Penetration
A crucial factor in determining penetration is the angle at which the shell hits the target's armor. The ideal angle is perpendicular to the armor plate—in this case, the shell has to pass through the least possible amount of armor plate in order to penetrate it. The perpendicular shell trajectory—the shell striking the armor plate exactly "square on"—is referred to as the normal.
The deviation from the normal is the so-called hit angle, which determines the effective armor thickness. It is the actual armor thickness the shell must travel through in order to penetrate and cause damage. The greater the hit angle, the greater the effective thickness of the armor.
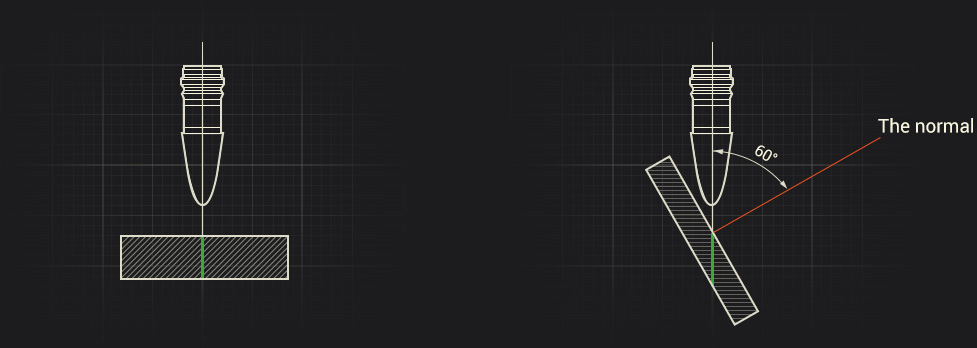
Keep in mind, though, that shells do not always penetrate vehicle armor. They can also bounce off the surface—this is called a ricochet. A ricochet can occur with Armor-Piercing (AP) and Armor-Piercing Composite Rigid (APCR) shells if the angle at the point of impact is greater than 70 degrees. High-Explosive Anti-Tank (HEAT) shells can ricochet at angles greater than 85 degrees (see Ammunition). Only High-Explosive (HE) shells never ricochet: if they don’t penetrate the armor, they explode on its surface.
Penetration

Ricochet

Armor Inspector
Effective gameplay requires understanding the armor protection of both your own vehicle and those of your enemies. Your Garage offers a useful tool for this. The Armor Inspector feature lets you check any vehicle's armor and estimate your chances of penetrating it, even if you don't own it. You can inspect:
- Nominal armor: the actual width of the main or spaced armor plate(s)
- Effective armor: the total resulting armor thickness along the shell trajectory
- Hit angle: the angle between the shell trajectory and the line perpendicular to the armor plate—the hit angle is calculated as though the shell moves in a straight line from the center of the screen
To find the Armor Inspector, click the ![]() (Vehicle Management) icon below the vehicle in your Garage, and then select ARMOR. Hover over armor plates to see all the information. If the vehicle has researchable modules to select from, configure them on the left side of the screen.
(Vehicle Management) icon below the vehicle in your Garage, and then select ARMOR. Hover over armor plates to see all the information. If the vehicle has researchable modules to select from, configure them on the left side of the screen.
Penetration Chance mode allows you to estimate the armor penetration depending on the attacking vehicle's parameters.
In the Overlay Type section on the right side of the screen, select Penetration Chance. The color scheme dynamically reflects the chance of armor penetration, factoring in both the hit angle and the attacker's configuration.
Select the attacking vehicle as well as its gun and shell type on the right side of the screen in the Attacker Configuration section. The inspected vehicle's effective armor, penetration, and ricochet chances will be calculated based on your selection.
Effective Shooting
Here are some useful techniques that you can use in combat to deal more damage.
Leading Targets
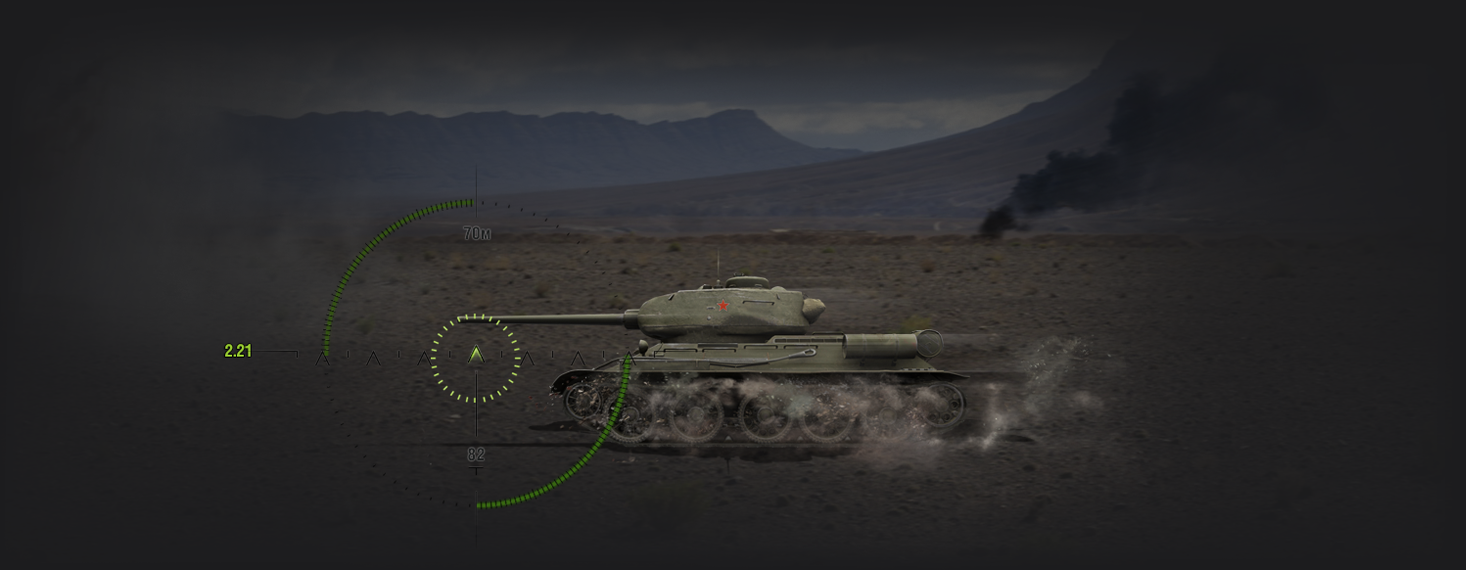
To hit a moving target, aim and shoot at the front or ahead of the enemy vehicle. The greater the distance and the greater the speed of the enemy vehicle, the farther ahead you should aim.
Auto-Aim
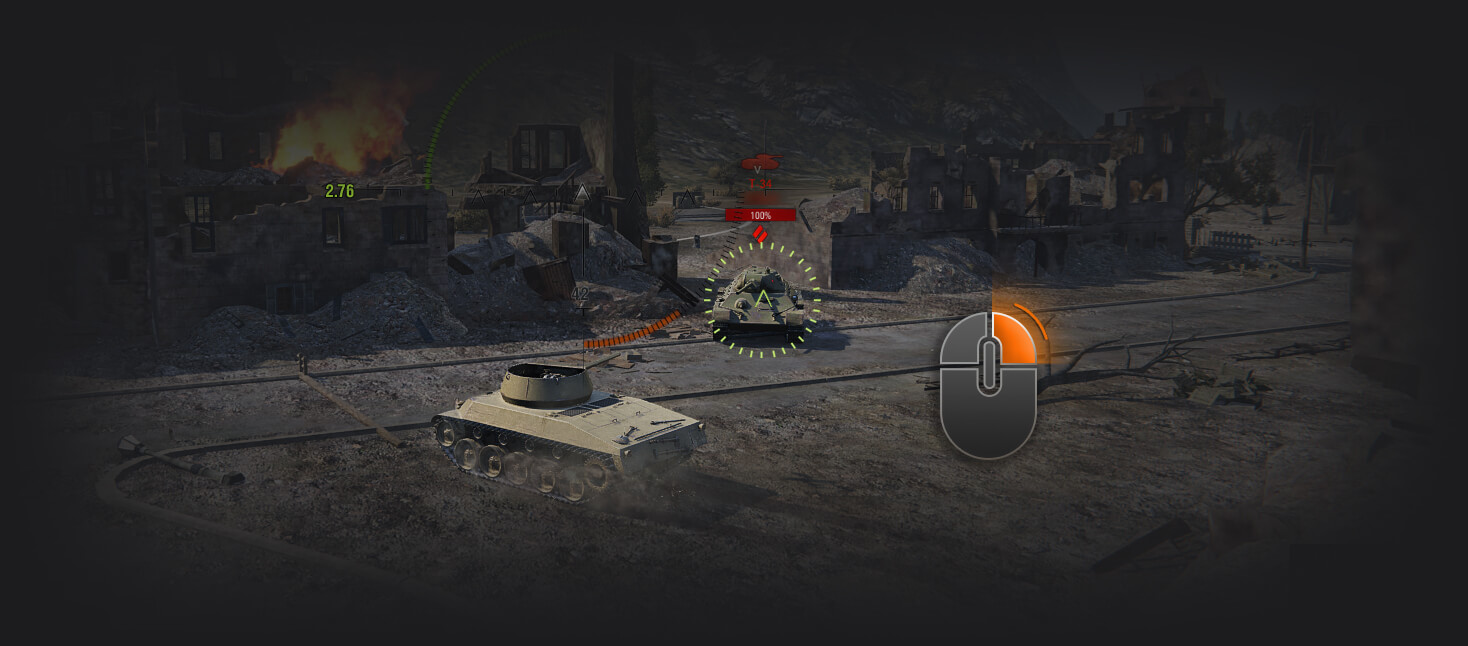
Activate Auto-Aim when you are focused on maneuvers and cannot aim your gun manually. It allows you to automatically lock on an enemy vehicle, aiming at its middle.
Auto-Aim does not take into account the opponent's weak spots, movement, and terrain obstacles.
Destroying Modules
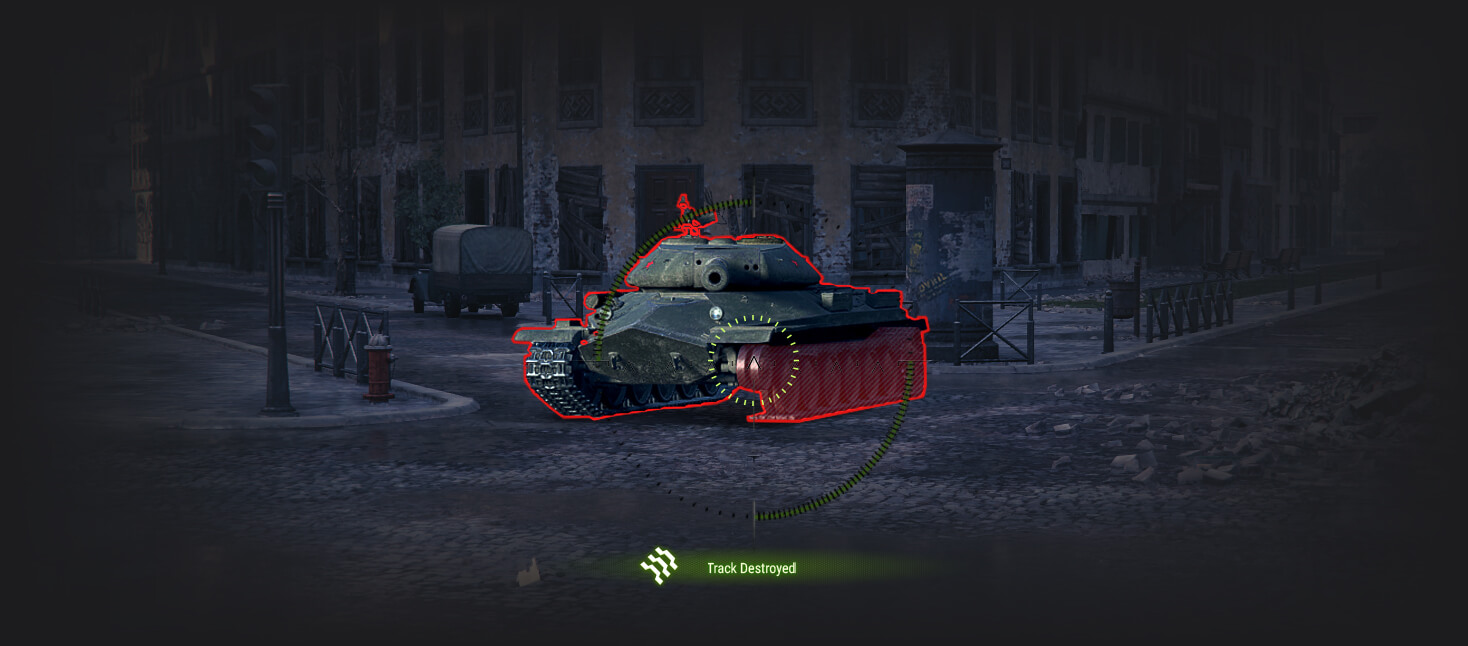
Your enemy is so tough that your shells do little or no damage? Switch to destroying modules—tracks, in particular. This tactic is especially effective against heavily armored vehicles of higher tier. Knocking out tracks can keep the opponent immobilized so that your more powerful allies can focus and destroy the enemy. At the end of battle, you will be rewarded for the damage caused with your assistance.
Pay attention to the specific damage mechanics of wheeled vehicles' suspension. Destroying it with one shot is almost impossible—you are more likely to destroy one or several wheels. With each wheel destroyed, a wheeled vehicle is slowed but does not stop completely. Destroy all the wheels to make its speed drop to the absolute minimum, leaving it with no chance of escape.
Terrain and Cover
Safe Positions
Always take advantage of terrain on the battlefield! Hide behind boulders, hills, and buildings to protect yourself from enemy fire or while you wait for your gun to reload. To stay safe from SPG fire, take cover behind large rocks, buildings, and other tall, massive objects.
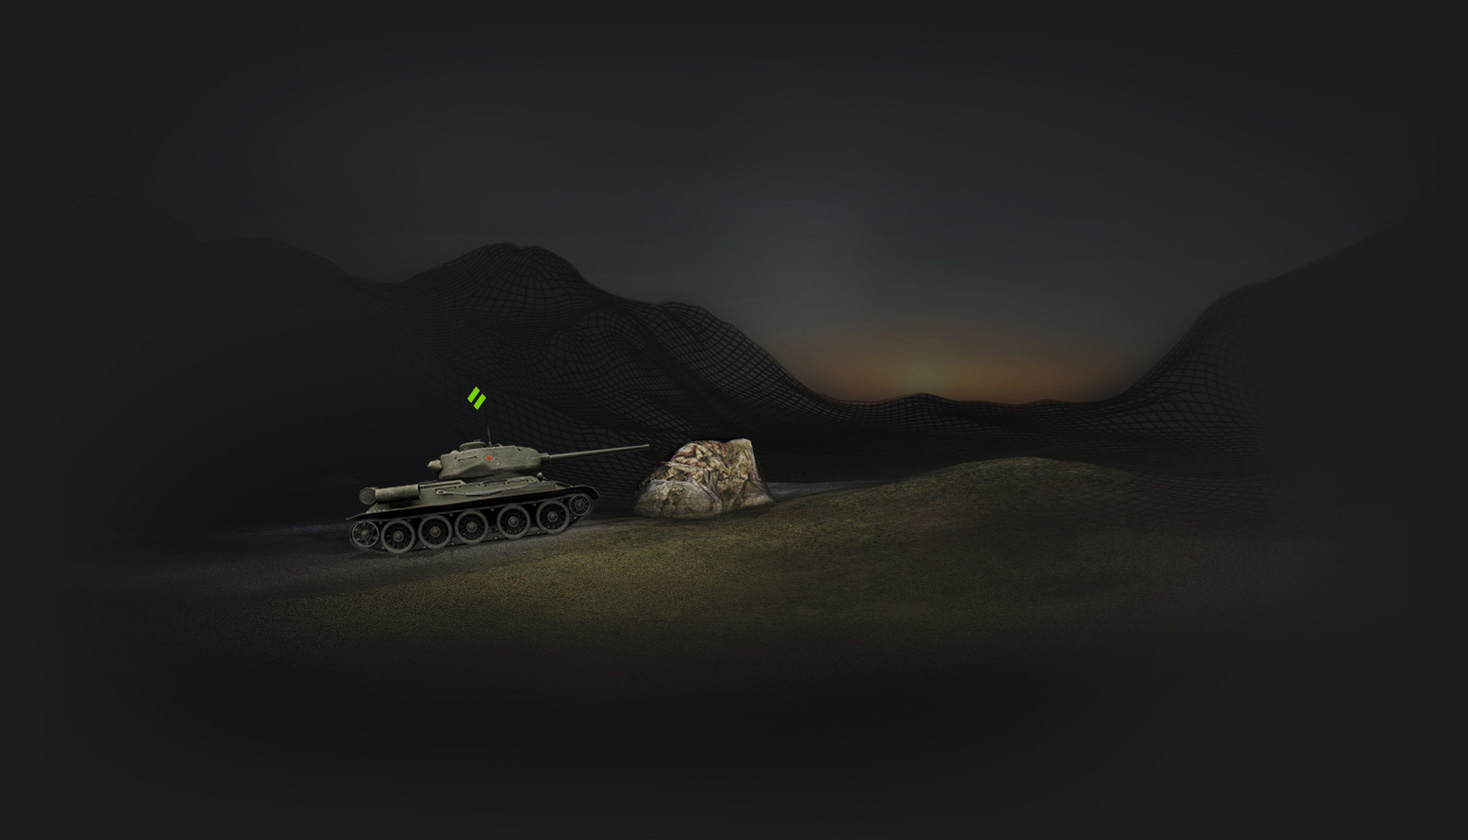
In addition to staying safe, you can use terrain to gain a position from which you can fire effectively without taking damage yourself. The tank in the picture is positioned behind a rise, so that opponents can see only its heavily armored turret. Meanwhile, the more vulnerable hull is hidden and safe.

Dangers on the Maps
Be cautious in your maneuvers: terrain can be dangerous! Don’t plunge off steep cliffs! If you’re lucky, you’ll just take damage to your vehicle, modules, and crew, but most likely, your vehicle will be destroyed.
Lakes, bays, deep rivers and canals—any deep water can be hazardous. Be careful while driving across bridges or finding shallow places to cross deep water. If your vehicle—specifically, the engine compartment—goes under water, you have only 10 seconds to save it from drowning.
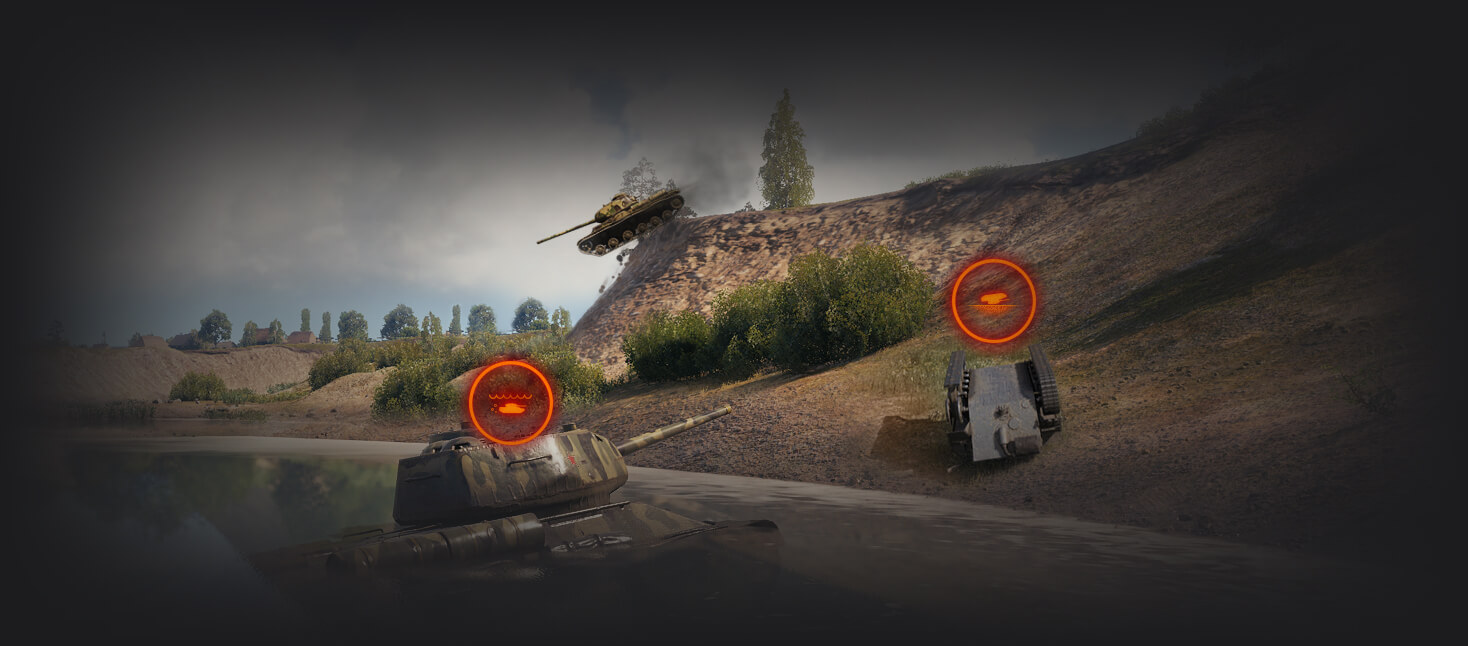
Upon performing extreme maneuvers, your vehicle may fall onto its side or even overturn – light and fast vehicles have this issue more often. A vehicle laying on its side is not only immobilized, but also almost defenseless: its view range, accuracy, and firing speed are significantly impaired. An overturned vehicle cannot fire at all and self-destructs after 30 seconds.
Your teammates can push your vehicle carefully to bring it back onto its tracks, but this does not always work.
Auto-flip
You can use the auto-flip mechanic in some game modes. If your vehicle is overturned and immobilized for a period of time, the auto-flip will automatically set your vehicle back onto its tracks. The following conditions need to be met to activate this mechanic:
- The vehicle is on its side or overturned.
- The vehicle has not moved for 3 seconds.
As soon as your vehicle meets these conditions, a timer starts, which will trigger the auto-flip mechanic. It should be noted that if your vehicle takes ramming damage or your teammates attempt to right your vehicle back onto its tracks, the countdown will restart.

Spotting and Concealment
Vehicle’s View Range
It’s hard to fight an enemy you can’t see. The earlier you spot enemy vehicles, the more advantage you have in battle. That’s why spotting is one of the core elements of the World of Tanks game mechanics.
View Range is the maximum distance at which your vehicle can spot opponents. This parameter is defined by vehicle characteristics, modified by crew perks and skills.

To have a complete picture of your vehicle's spotting and view range capability, you can use special circles on the minimap that depict proximity spotting range, view range, maximum spotting range and vehicle draw distance.
- Proximity Spotting Circle. A 50 m radius in which the vehicle is automatically spotted despite obstacles and concealment.
- View Range Circle. Shows the View Range value of your vehicle, adjusted in accordance with the skills and perks of your crew and equipment mounted on your vehicle.
- Maximum Spotting Range. The maximum spotting range of all vehicles cannot exceed 445 meters. Even if your View Range exceeds this value, you won’t be able to spot an enemy on your own beyond this distance; however, it will be easier for you to detect concealed vehicles within this range.
- Draw Circle. Shows the maximum draw range within which other players’ vehicles can be seen on your battle screen. This value is always 565 meters.
You can turn on the display of these circles in the game settings. Go to the General tab and select the necessary options in the View range Indicators on the Minimap section.
Another essential component in spotting and keeping track of the enemy is Signal Range. Your vehicle’s Signal Range is the maximum distance at which you can exchange information with your allies about other vehicles’ position. Signal Range values are defined by radio characteristics, modified by crew perks and skills.
If your ally spots an enemy and is within range to share this information with you, the icon of the spotted vehicle will appear on your minimap, even if the vehicle is beyond your Draw Range and cannot be seen directly. So you’d be wise to get the best radio available!
Concealment
Staying out of the enemy’s sight will help you survive the battle and deal more damage. Learn to conceal your vehicle!
Thick bushes and fallen trees can conceal your vehicle. Remember, your entire vehicle must be blocked by the foliage, otherwise you will not be hidden. The exception to this rule is your gun: if your gun extends beyond the bush, it will not ruin your concealment.
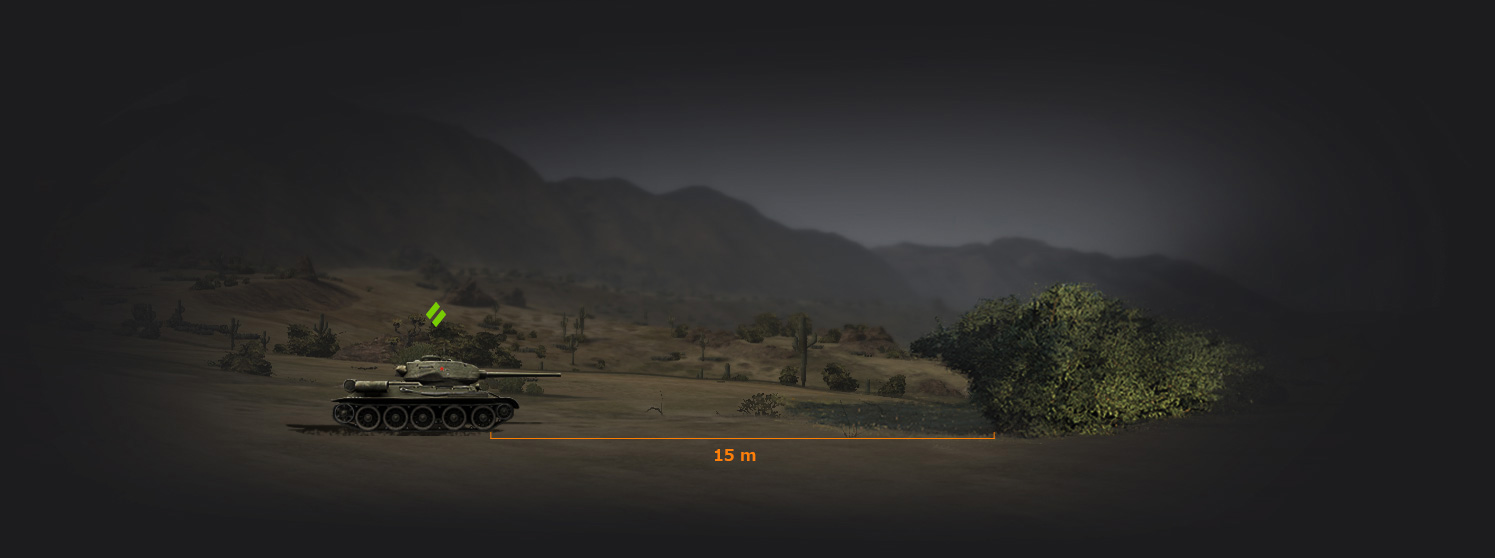
If you are within 15 meters of the bush, you will be able to see other vehicles through it. You’ll be not only out of sight, but also in position for an ambush.
A vehicle is concealed the most when it is not moving. Only Tier V or higher light tanks keep their concealment values unchanged while moving or standing still.
Concealment drops dramatically when you fire a gun. Shooting also negatively affects the flora within a 15-meter radius, making it transparent. At the same time, gun and turret traverse do not affect the concealment of any stationary vehicle.
You can improve your vehicle's view range and reduce it's visibility by using equipment, consumables, special crew perks, camouflage, and Directives.
Improving View Range and Concealment


Tanks and Tactics
World of Tanks features five vehicle types, and each of them requires certain tactics on the battlefield.
![]() Light Tanks. Light tanks are the eyes and ears of the team. They are the fastest tanks and have great View Range, but usually thin armor and fairly poor firepower.
Light Tanks. Light tanks are the eyes and ears of the team. They are the fastest tanks and have great View Range, but usually thin armor and fairly poor firepower.
![]() Medium Tanks. Multi-purpose combat vehicles. They combine mobility, firepower, and relatively good armor, so they are useful both in frontline combat and in a support role from mid-range. However, Medium tanks should not fight alone: a solo Medium tank is typically easy prey, while several in a pack can quickly dismantle opponents.
Medium Tanks. Multi-purpose combat vehicles. They combine mobility, firepower, and relatively good armor, so they are useful both in frontline combat and in a support role from mid-range. However, Medium tanks should not fight alone: a solo Medium tank is typically easy prey, while several in a pack can quickly dismantle opponents.
![]() Heavy Tanks. Heavily armored vehicles with powerful guns. Their main role is to push a flank or meet an enemy push, dealing massive damage and blocking enemy fire with their thick armor. This type of vehicle is relatively slow and usually has a low fire rate. Also note that heavy tanks are usually the favorite targets of enemy SPGs.
Heavy Tanks. Heavily armored vehicles with powerful guns. Their main role is to push a flank or meet an enemy push, dealing massive damage and blocking enemy fire with their thick armor. This type of vehicle is relatively slow and usually has a low fire rate. Also note that heavy tanks are usually the favorite targets of enemy SPGs.
![]() Tank Destroyers. These are snipers with accurate and powerful guns. Generally compact and easy to hide, they seek to fire at long distances while staying completely unseen. Tank destroyers are often turretless, poorly armored, and slow, so they are vulnerable in close combat.
Tank Destroyers. These are snipers with accurate and powerful guns. Generally compact and easy to hide, they seek to fire at long distances while staying completely unseen. Tank destroyers are often turretless, poorly armored, and slow, so they are vulnerable in close combat.
![]() Self-Propelled Guns. SPGs provide long-range firepower for their team using HE and Armor-Piercing shells. They are able to hit targets almost anywhere on the map, and their HE shells deal splash damage, sometimes to several vehicles at a time. Shells of 139.7 mm caliber and greater also have a stun effect, which temporarily weakens all vehicle characteristics of the target. SPGs are slow, and their armor is extremely weak.
Self-Propelled Guns. SPGs provide long-range firepower for their team using HE and Armor-Piercing shells. They are able to hit targets almost anywhere on the map, and their HE shells deal splash damage, sometimes to several vehicles at a time. Shells of 139.7 mm caliber and greater also have a stun effect, which temporarily weakens all vehicle characteristics of the target. SPGs are slow, and their armor is extremely weak.
