You can also move your vehicle using Cruise Control:
 Move Forward in Cruise Control Mode
 Move Backward in Cruise Control Mode
Press either of the Cruise Control keys once to put your vehicle in the lowest speed, twice for medium speed, and three times for maximum speed.
![]() Use the handbrake to bring your vehicle to a sudden stop. This can be especially useful when you need to come to a halt to fire with greater accuracy.
Use the handbrake to bring your vehicle to a sudden stop. This can be especially useful when you need to come to a halt to fire with greater accuracy.
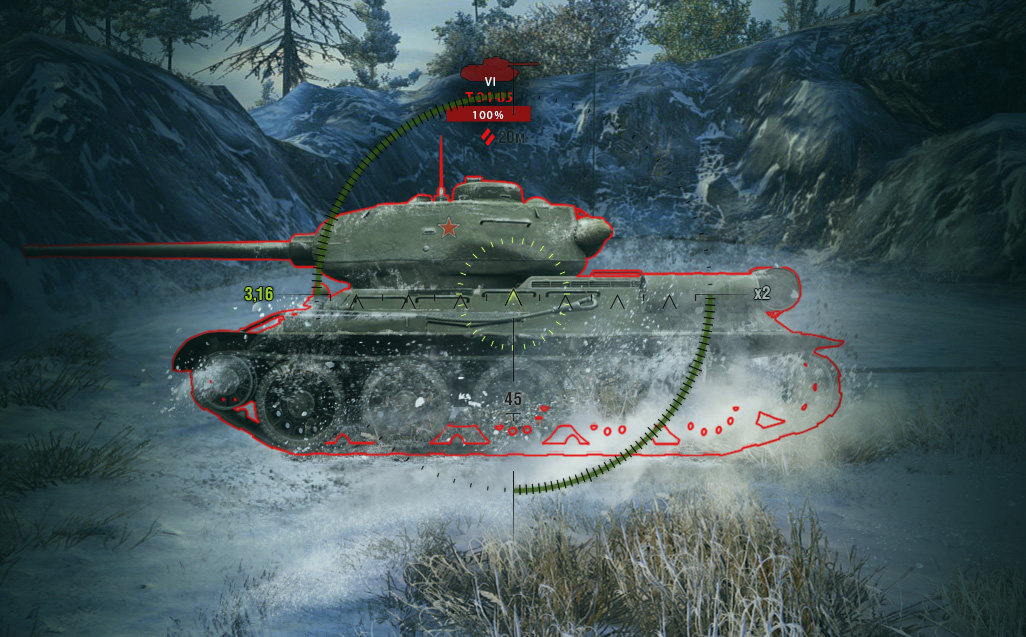
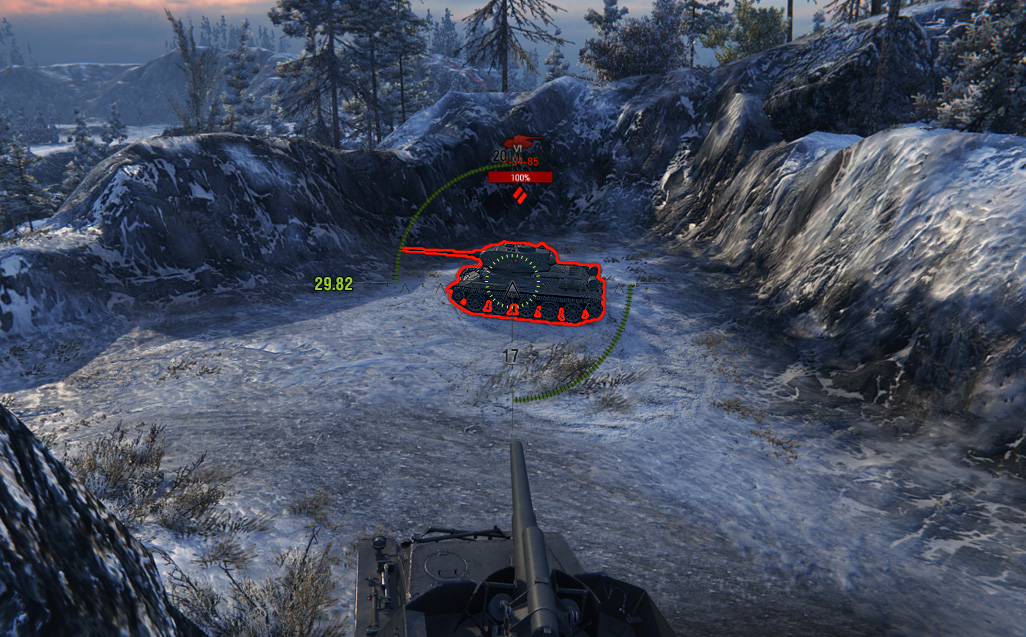
Reticle
Each accurate shot gets you closer to victory. That’s why it is extremely important to master the art of aiming and shooting.
The reticle is the central element of the screen. It’s essential for firing. For excellent shooting, learn the components of the reticle and how its elements work.
Interactive image. Mouse over the points ![]() to display detailed information.
to display detailed information.
Range to Target
Distance to the target in meters.
Gun Loading
Indication of the current state of your gun: loaded and ready to fire, or reloading. This indicator becomes red during reloading.
Shells Remaining
The number of available shells of the selected type.
Containers
The number of shells left in the magazine. This indicator is displayed only for guns with a magazine loading system.
Condition Indicator
Indication of your vehicle’s HP. Shows the vehicle’s state, while aiming.
Loading Timer
Your vehicle gun’s reload time with a countdown between shots.

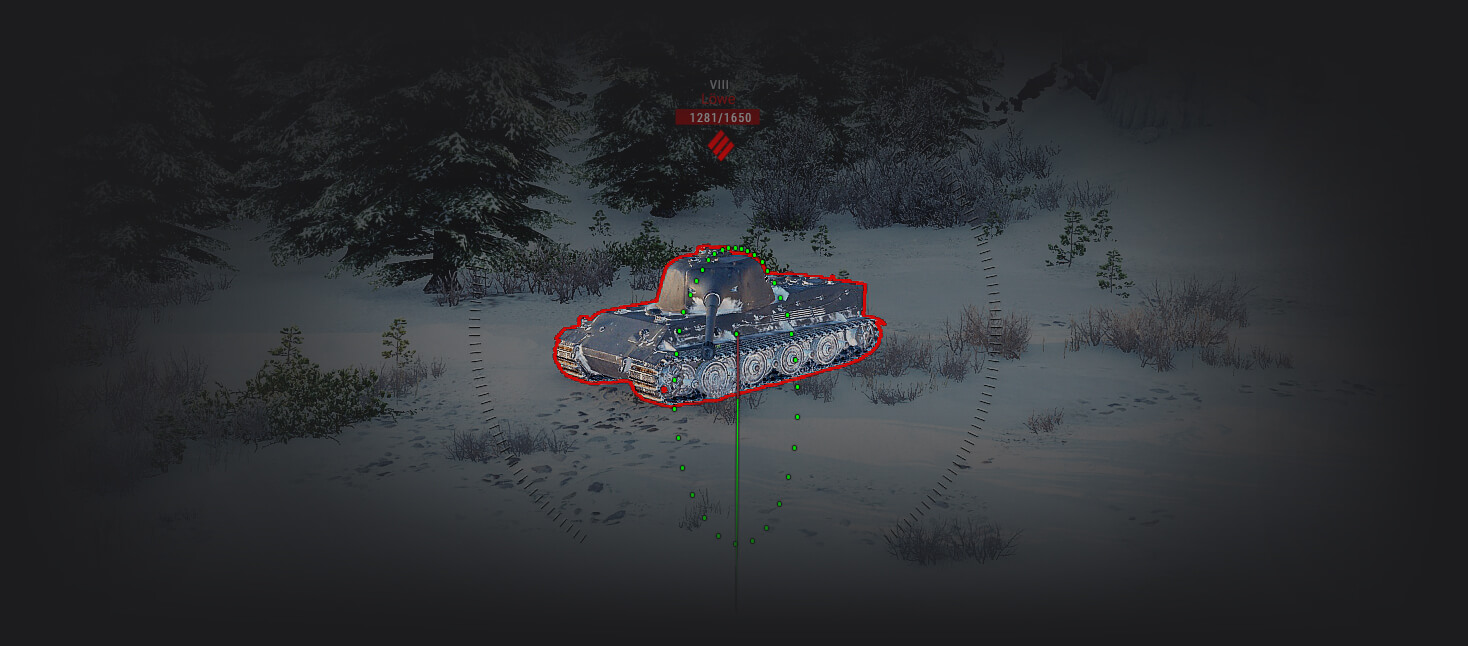
Reticle
The reticle is always displayed in the center of the screen and follows the movement of the camera. The reticle indicates only the direction you are looking, not the direction the gun is pointing.
The central point of the Reticle is called the Central Marker.
Dispersion
The circle in which your shot will land. Traversing your turret and hull reduces your firing accuracy, causing this circle to expand. For better accuracy, wait for the aiming circle to shrink. After moving your vehicle or turning turret, come to a stop and wait for the aiming circle to snap onto the target.

Aiming Circle
The aiming circle indicates the current gun position and follows the reticle with a delay, since the gun cannot move instantaneously.
To fire accurately, wait until the Gun Marker in the center of the Aiming circle aligns with the Reticle’s Central Marker.
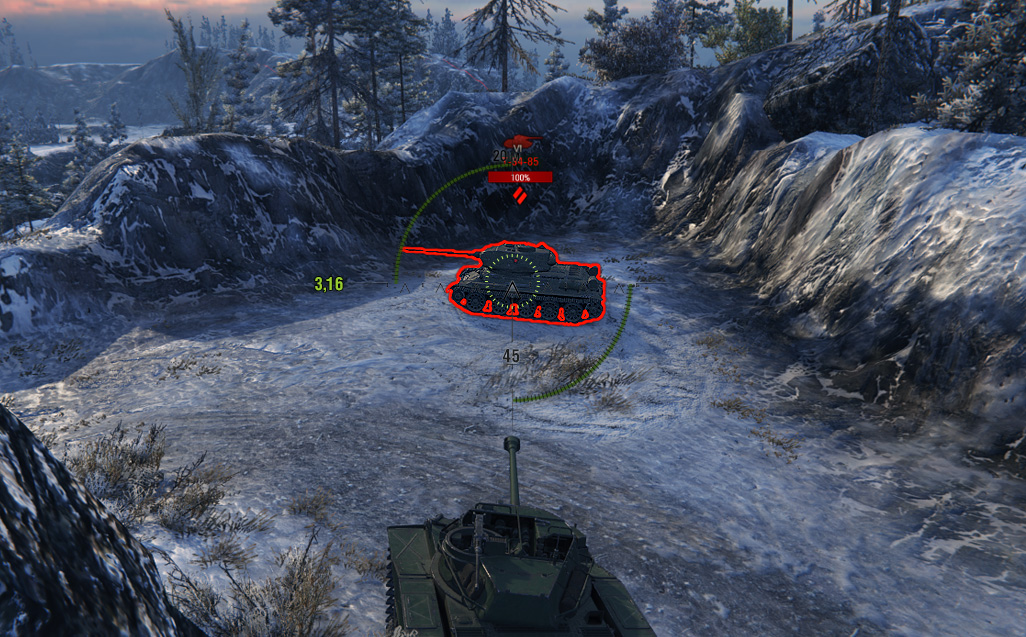
Aiming Modes
Arcade Mode
Arcade mode is the default aiming mode in World of Tanks. With the camera positioned behind your vehicle, you can observe yourself, other players, and the situation on the battlefield.
This mode is best suited for battles at short and medium ranges.
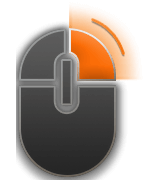
Press and hold the right mouse button to take a look around without moving your gun.
Sniper Mode
Sniper mode is available for all types of vehicles except SPGs and lets you play the game from the first-person perspective. It’s essential for long-range shooting and taking precise aim at modules.
![]() or
or  Switch to Sniper mode.
When playing in Sniper mode, you’ll see the Zoom Indicator to the right of the reticle. It tells you how much the image is currently enlarged. The highest zoom level is ×8 by default. You can increase the zoom level up to ×25 in the game settings.
Avoid using Sniper mode all the time: it’s great while focusing on a single target; however, it impairs your ability to maintain overall battle awareness.
Auto-Aim
With Auto-Aim, your reticle is fixed on the center of the enemy vehicle, and the gun automatically lays on it. This mode comes in handy when you fire on the go.
 Activate/Deactivate Auto-Aim.
Auto-Aim is deactivated when the target moves out of sight.
Artillery Mode
Artillery mode is available to SPGs only, and allows you to see the map from above and make long-range shots.
![]() or
or ![]() Switch to Artillery mode.
Switch to Artillery mode.

The line going to the center of the reticle is the approximate firing trajectory. It’s sensitive to the landscape and is color-coded:
- green — your shell will reach its target;
- red — there’s an obstacle on the way, usually a hill or building;
- grey — the target is out of range.
There is also an alternative version of Artillery mode called Trajectory View. It’s similar to Sniper mode and can help you more clearly estimate the trajectory of your shell for greater accuracy.
 Switch to Trajectory View.
In the game, there is an automatic system of penalties for team damage and teamkills (see Teamkill).
Shooting
Now that you know how to move the gun and how the reticle works, you can go into battle!
To fire at an enemy vehicle:
- Take aim at the enemy vehicle.
- Wait until the Aiming circle fully aligns with the Reticle. The Gun Marker should match the Central Marker.
- Wait for the aiming circle to shrink onto the target.
- Left-click to fire at the target.
Wait for the gun to reload and the aiming circle to shrink before firing again.