


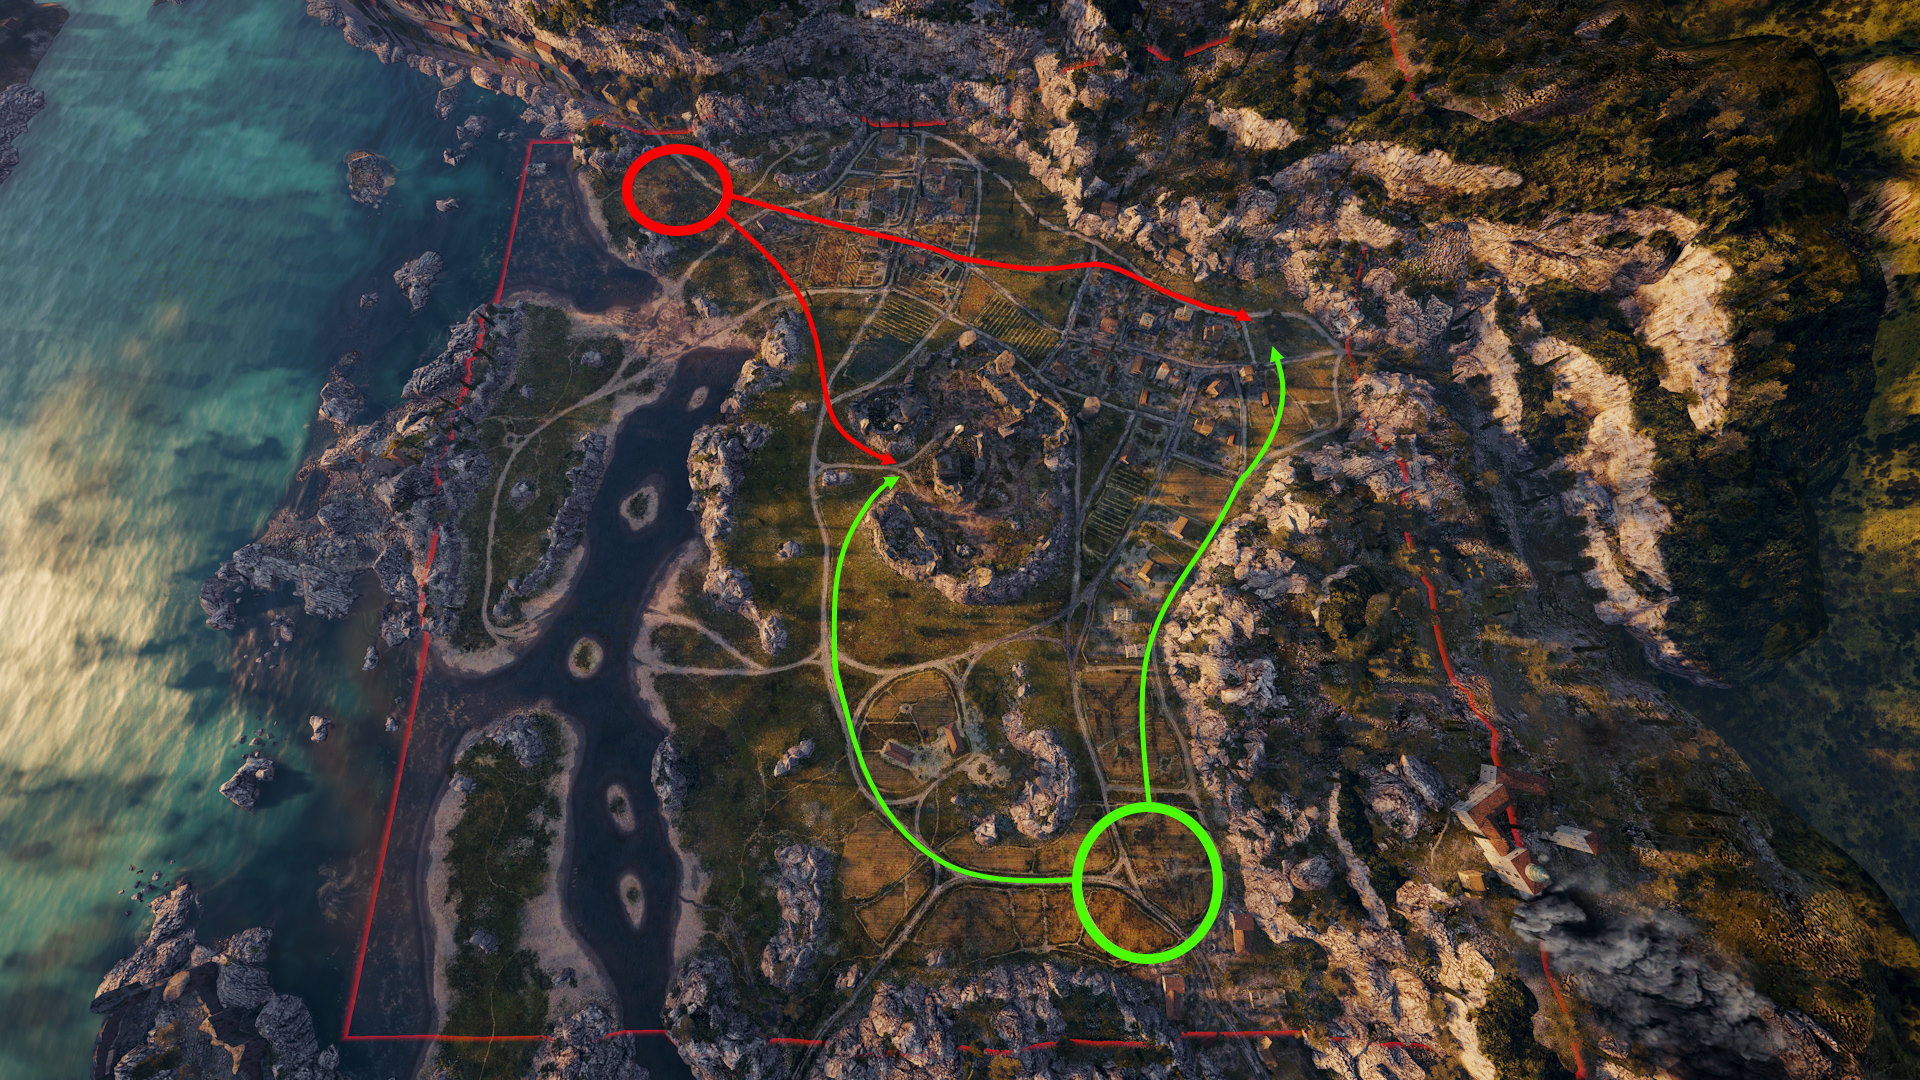
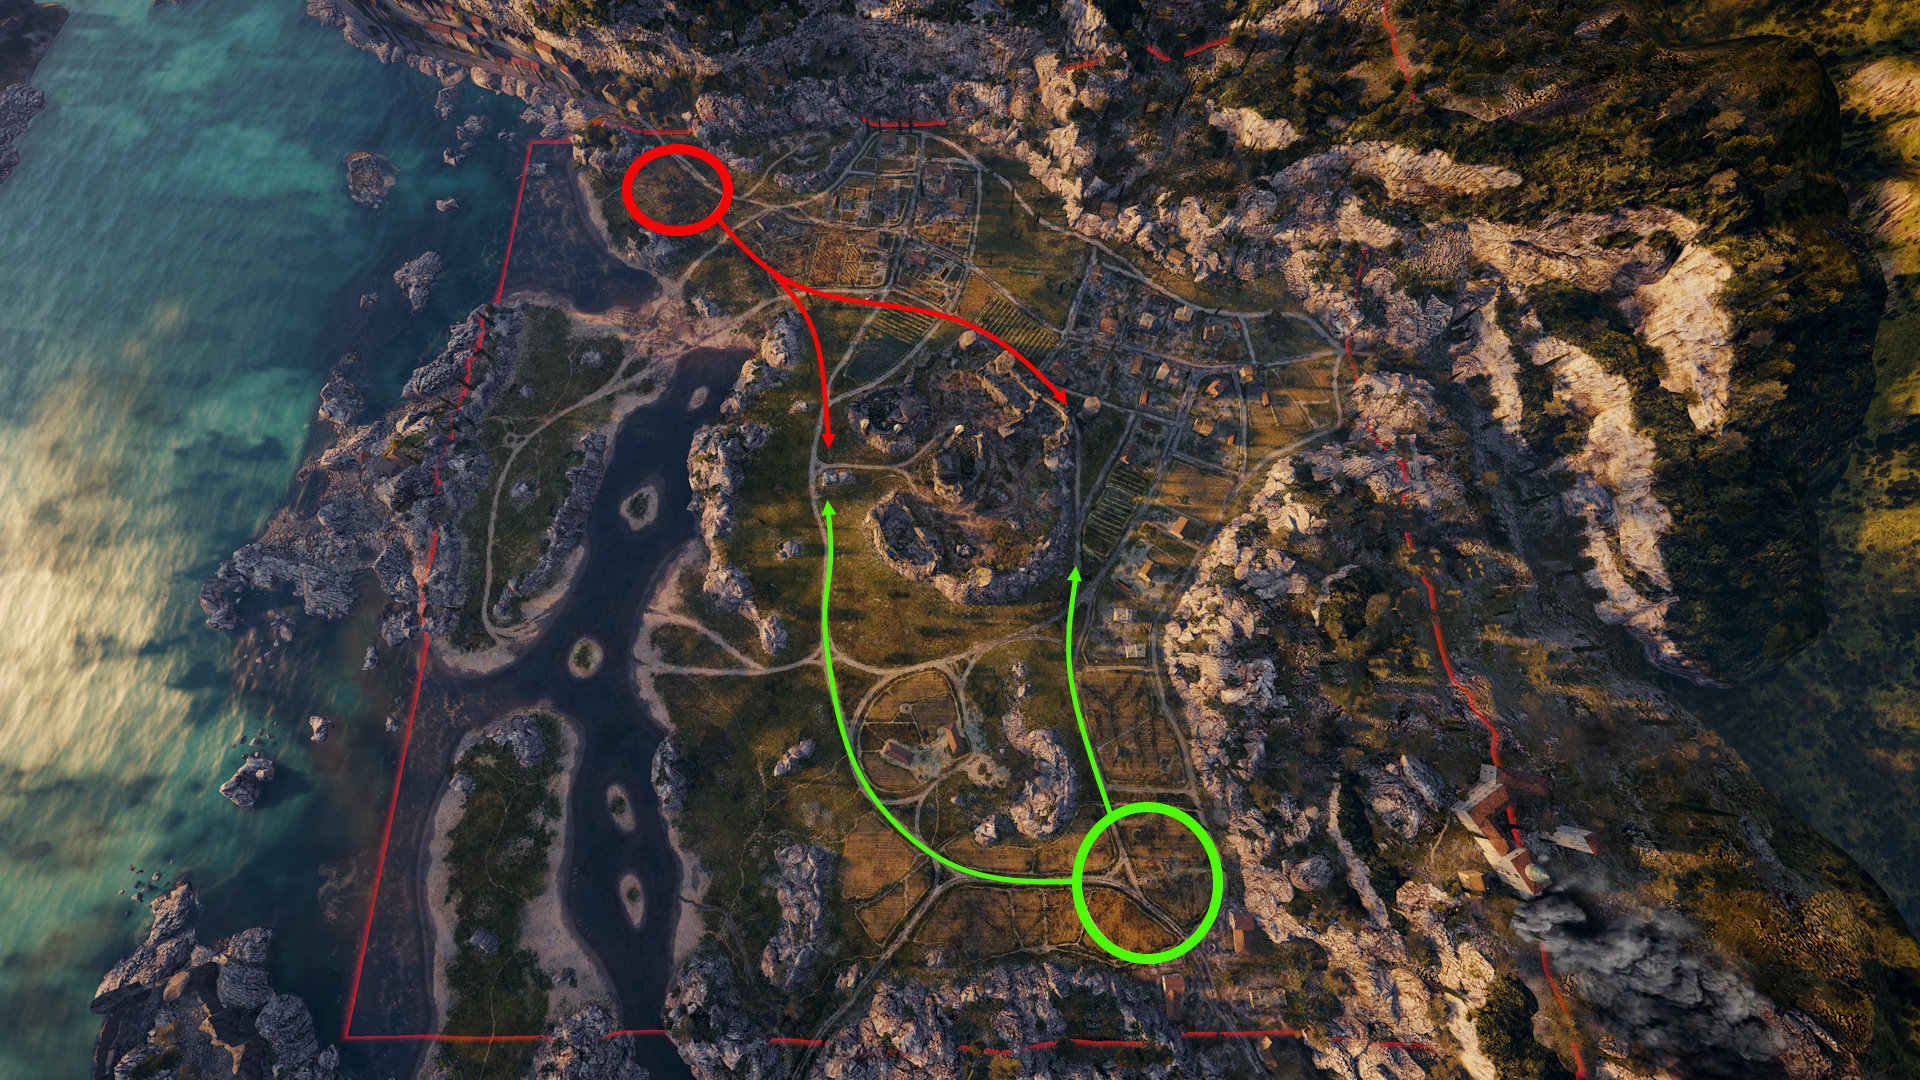
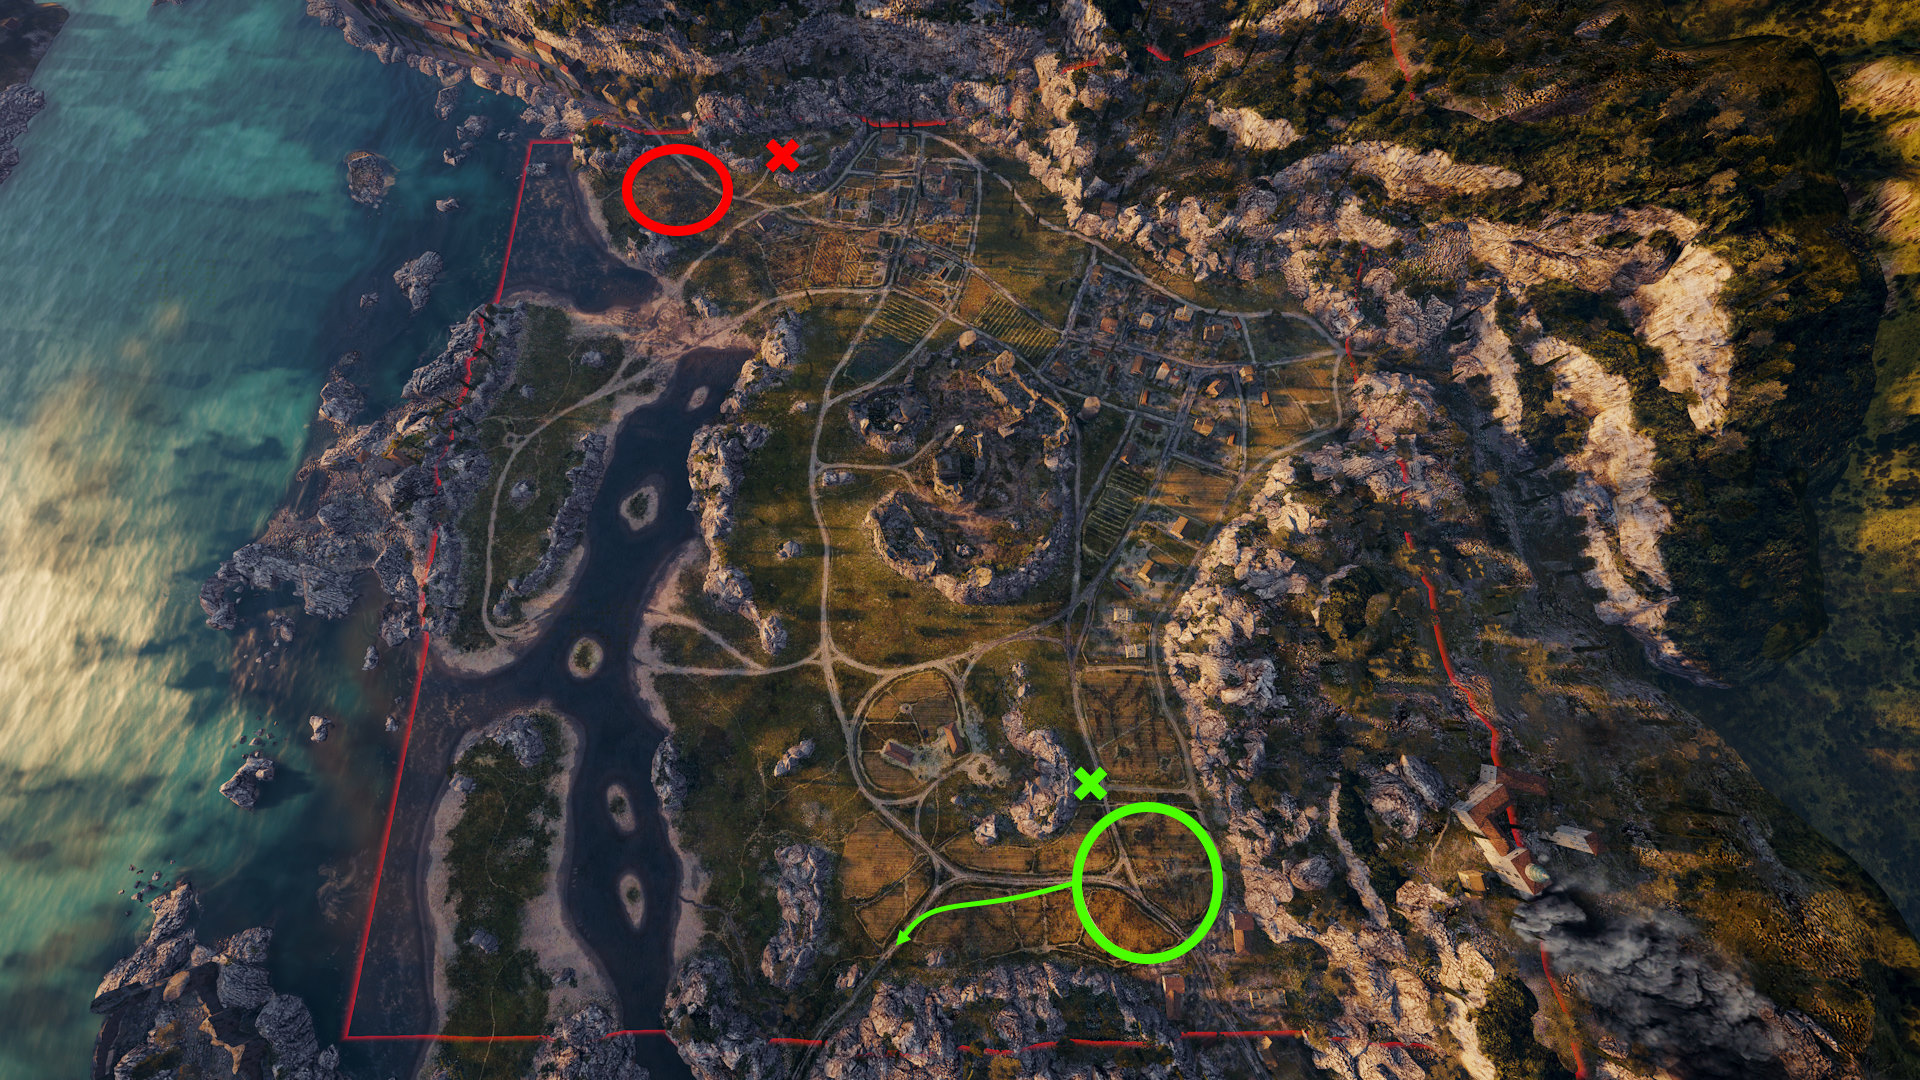
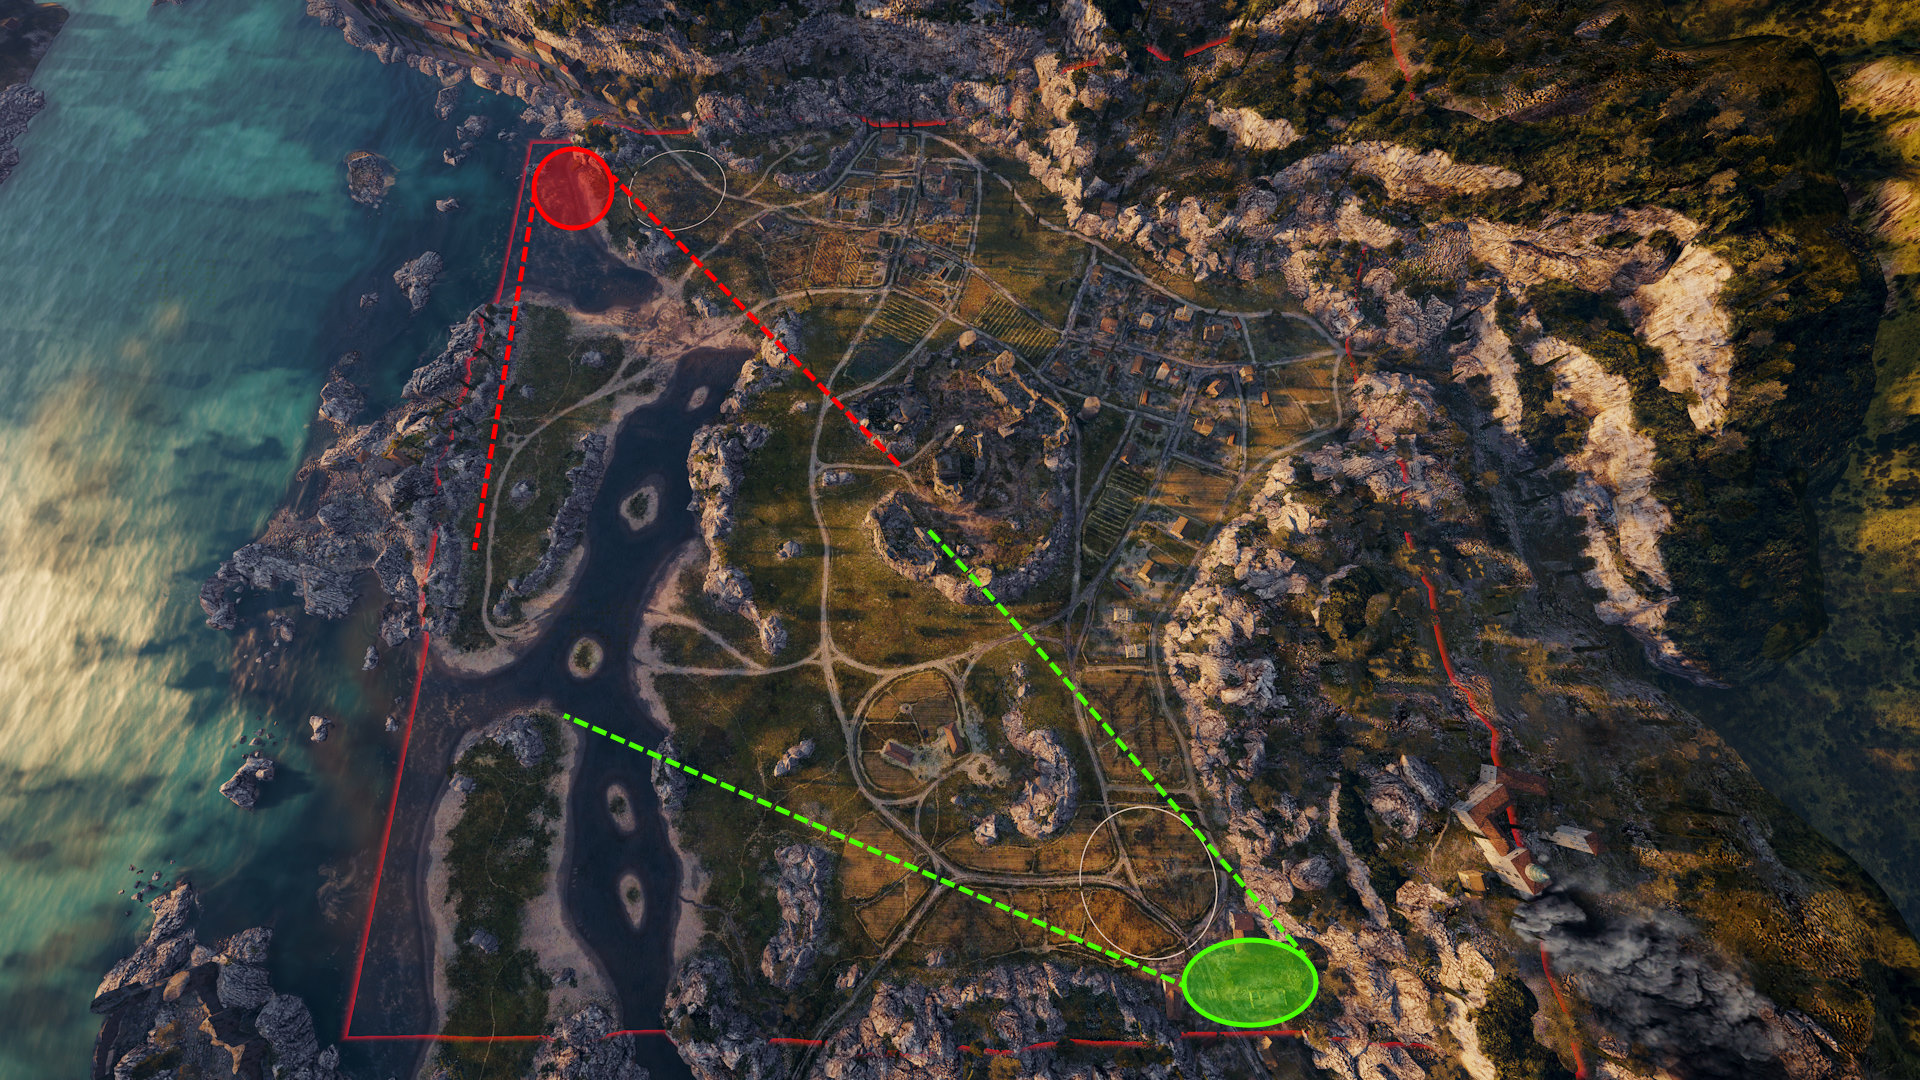
An excellent crossfire position to support allies in the middle and control the southwestern area of the map.

A nice vantage point to counter enemies advancing on the island while also supporting the middle.
- Light Tanks
- Medium Tanks
- Heavy Tanks
- Tank Destroyers
- SPGs

-
The hilltop in the center of the map (around E6) is highly important, especially early in the match. Fast light tanks should immediately try to take the area for their team and spot enemies from higher ground.
-
Slower light tanks can also advance to the middle to ascend the hill but should have the support of medium or heavy tanks.
-
Positions on the island (E1 and H1/H2) are good for spotting but can be overrun by more powerful TDs.
-
Fast medium tanks should support team advancement in the center. Either take the hill with light tank allies or support the ascend from pockets at D4 and G4.
-
Well-armored medium tanks and those with high firepower can open up a second flank through the village in the west (D9 and E9) while their allies have control of the hill area.
-
Advance to the area around the foot of the hill (D5 to D7 and G5 to G7). It allows you to spot enemies atop while brawling with opponents along columns 5 and 7.
-
If your team doesn’t have control of the hill, support the advancement of slower light and medium tanks and take a position in the pockets around D4 and G4.
-
Powerful snipers and tank destroyers with weak armor should stay close to their base (around A4, J7, and K5) to provide fire support into the middle.
-
Taking positions on the islands at E1 and H1/H2 allows further supporting the middle, especially during the late game.
-
Take position in A1 and K9 to provide covering fire for allies fighting for the path up the hill at E5.
