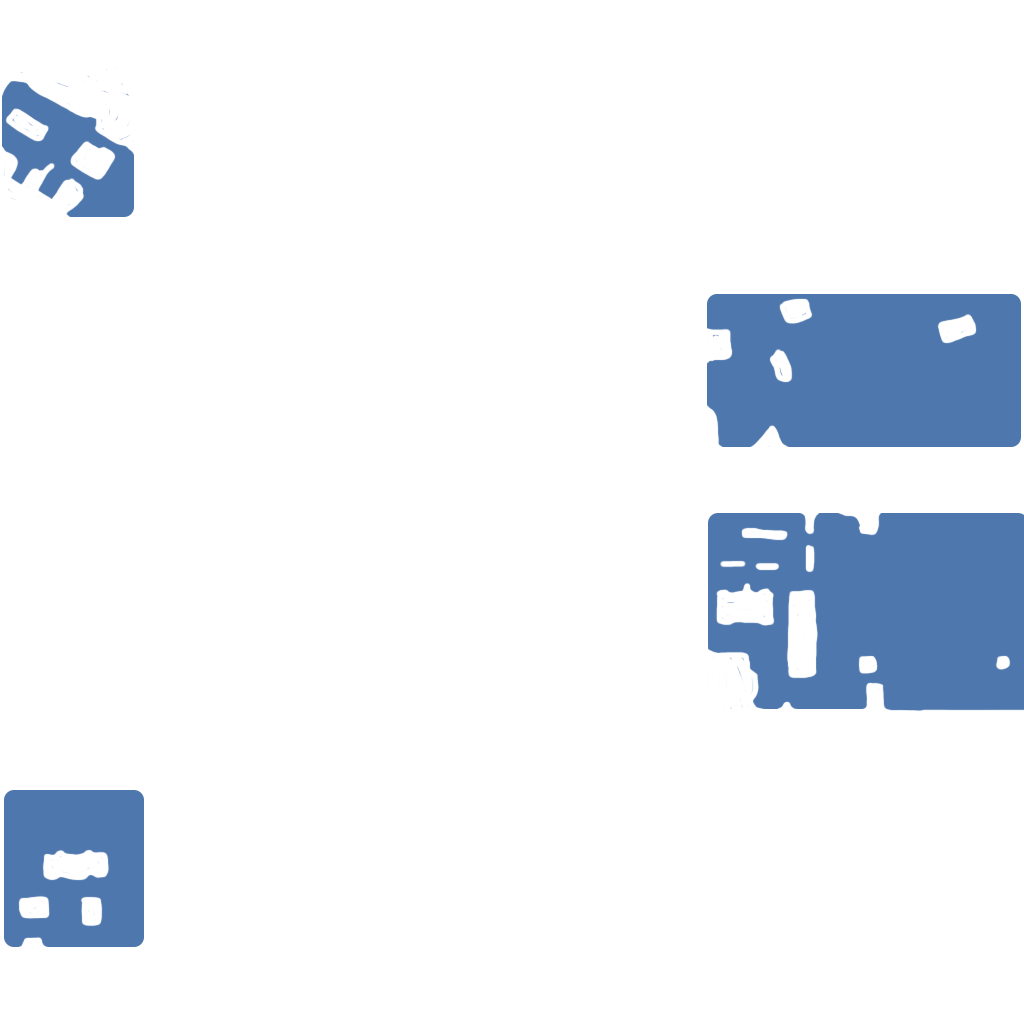
Map Guide: Ensk

A mixture of city blocks and wooded outskirts, bisected by railroad tracks. Plan your tactics to take advantage of defensive choke points, positioning your vehicles to cover the gaps. Artillery is great for deterring enemy breakthroughs, but remains almost defenseless when exposed to enemy vehicles attacking from cover.


Commanders!

Watch the Map Guide video and read on to learn useful tips and strategies for every vehicle class, get insider tricks, and more.

Ensk is a Summer map available for Tier IV–X battles. The rails on the 6 line divide the battlefield into two zones: The western part with the streets of Ensk, where battles take place around tight corners, and the eastern section with an open, hilly area commonly referred to as "the green." Find out which vehicles and tactics excel in each location and learn why the most direct route isn't always the best.

Map Overview

Interactive image. Hover the cursor over icons on the minimap to view additional information.

Great sniper position to support advancing heavy tanks and cover the 1 line against flanking enemies.

Great sniper position to support advancing heavy tanks and cover the 1 line against flanking enemies.

Window positions for hull-down tactics, surprise assaults, and spotting.

Excellent scouting position for vehicles with high camouflage or great side scraping capabilities.

Covered positions for scouts and snipers.

Covered positions for scouts and snipers.

Light Tanks
Medium Tanks
Heavy Tanks
Tank Destroyers
Self-Propelled Guns

Check the map above to see the most favorable positions for every class and points of interest to gain the upper hand.

  • Watch the minimap: Rails divide the map vertically and the only direct horizontal routes to the opposite sides cross the cap circles. Constantly check the minimap, and disengage from combat if the other side of the battlefield collapses. 
  • Beware long alleys: The rail cars provide quick north and south routes, but long stretches do not have escape routes and can become deathtraps.
  • Know the battleground: Enemies can hide behind rail cars, but remember: You can shoot them between the wheelsets and cause damage.
  • Proceed with Caution: Enemies might try and flank from the western street (A1 through J1), so if you don't have any tanks covering it from B1 or J1 positions respectively, advancing without checking that street is a dangerous—possibly fatal—endeavor.

Class Strategies

  • Light Tanks
  • Medium Tanks
  • Heavy Tanks
  • Tank Destroyers
  • SPGs
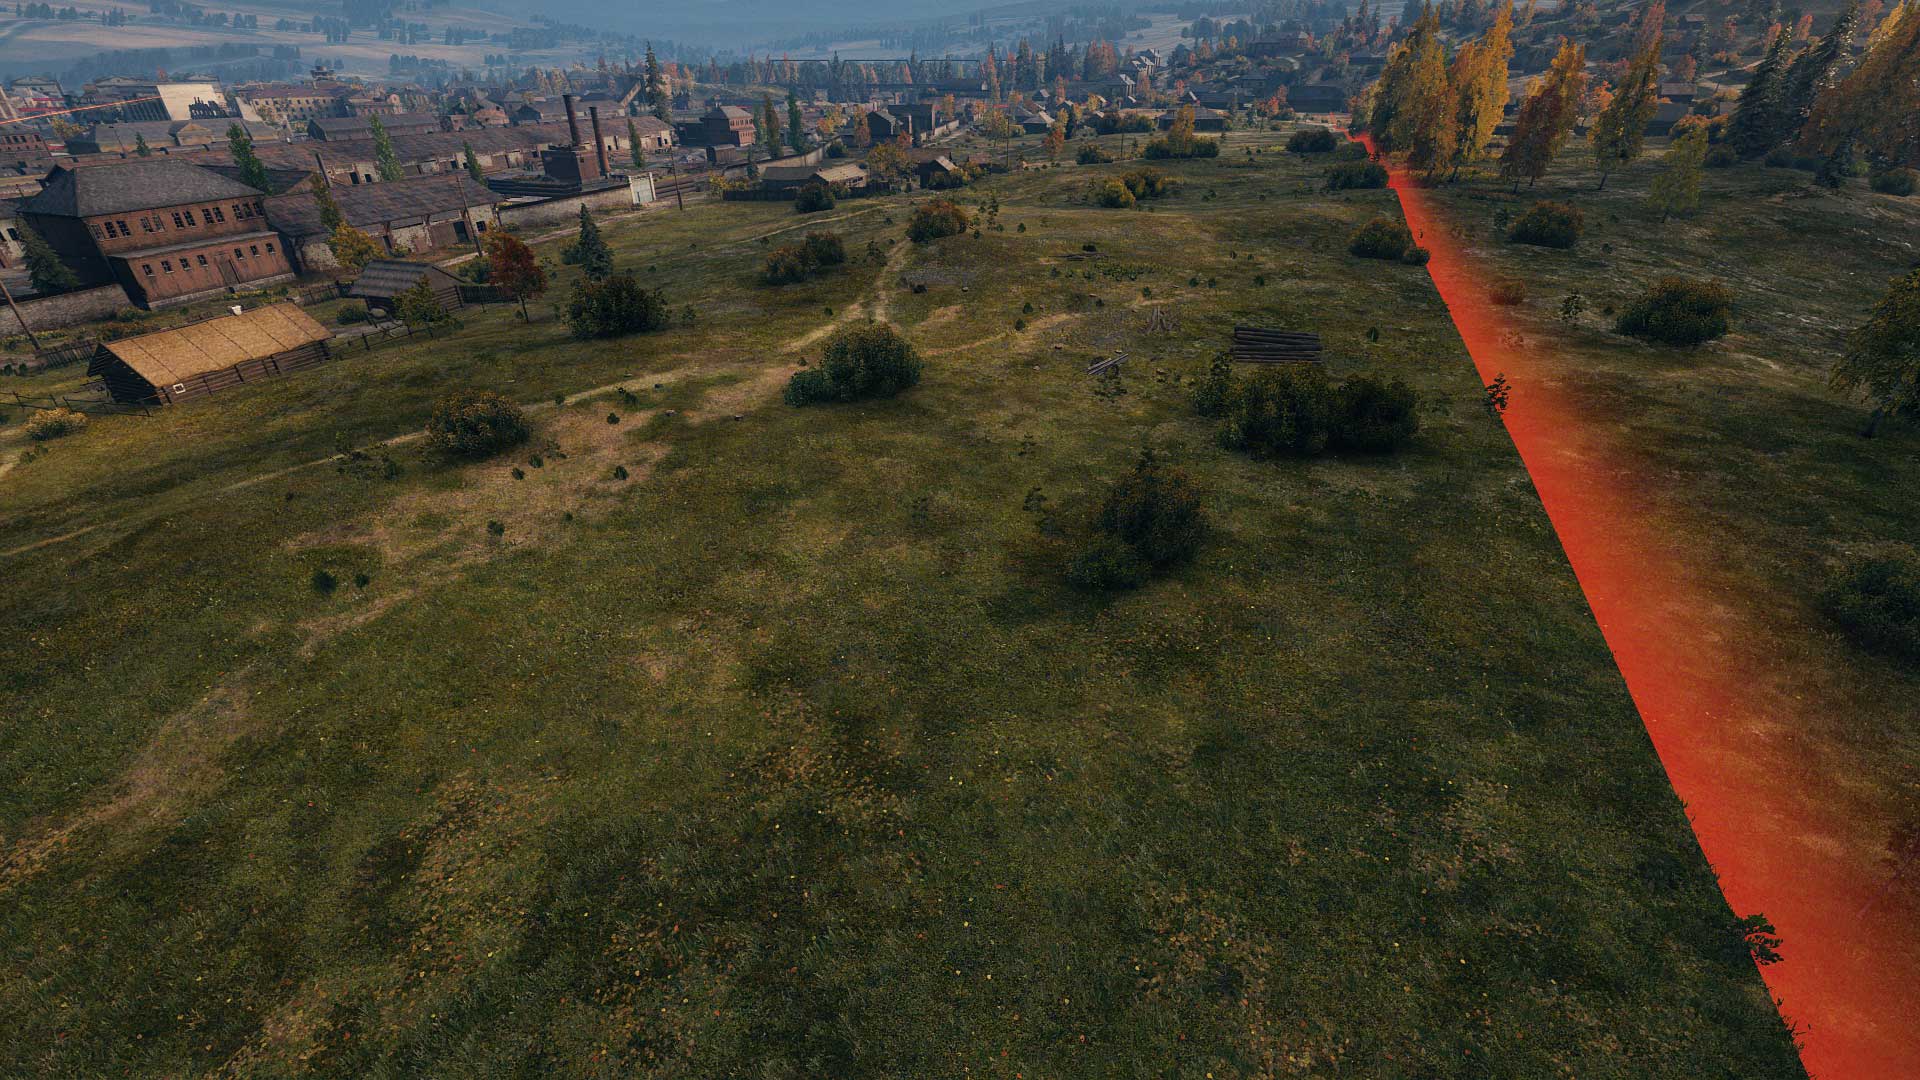
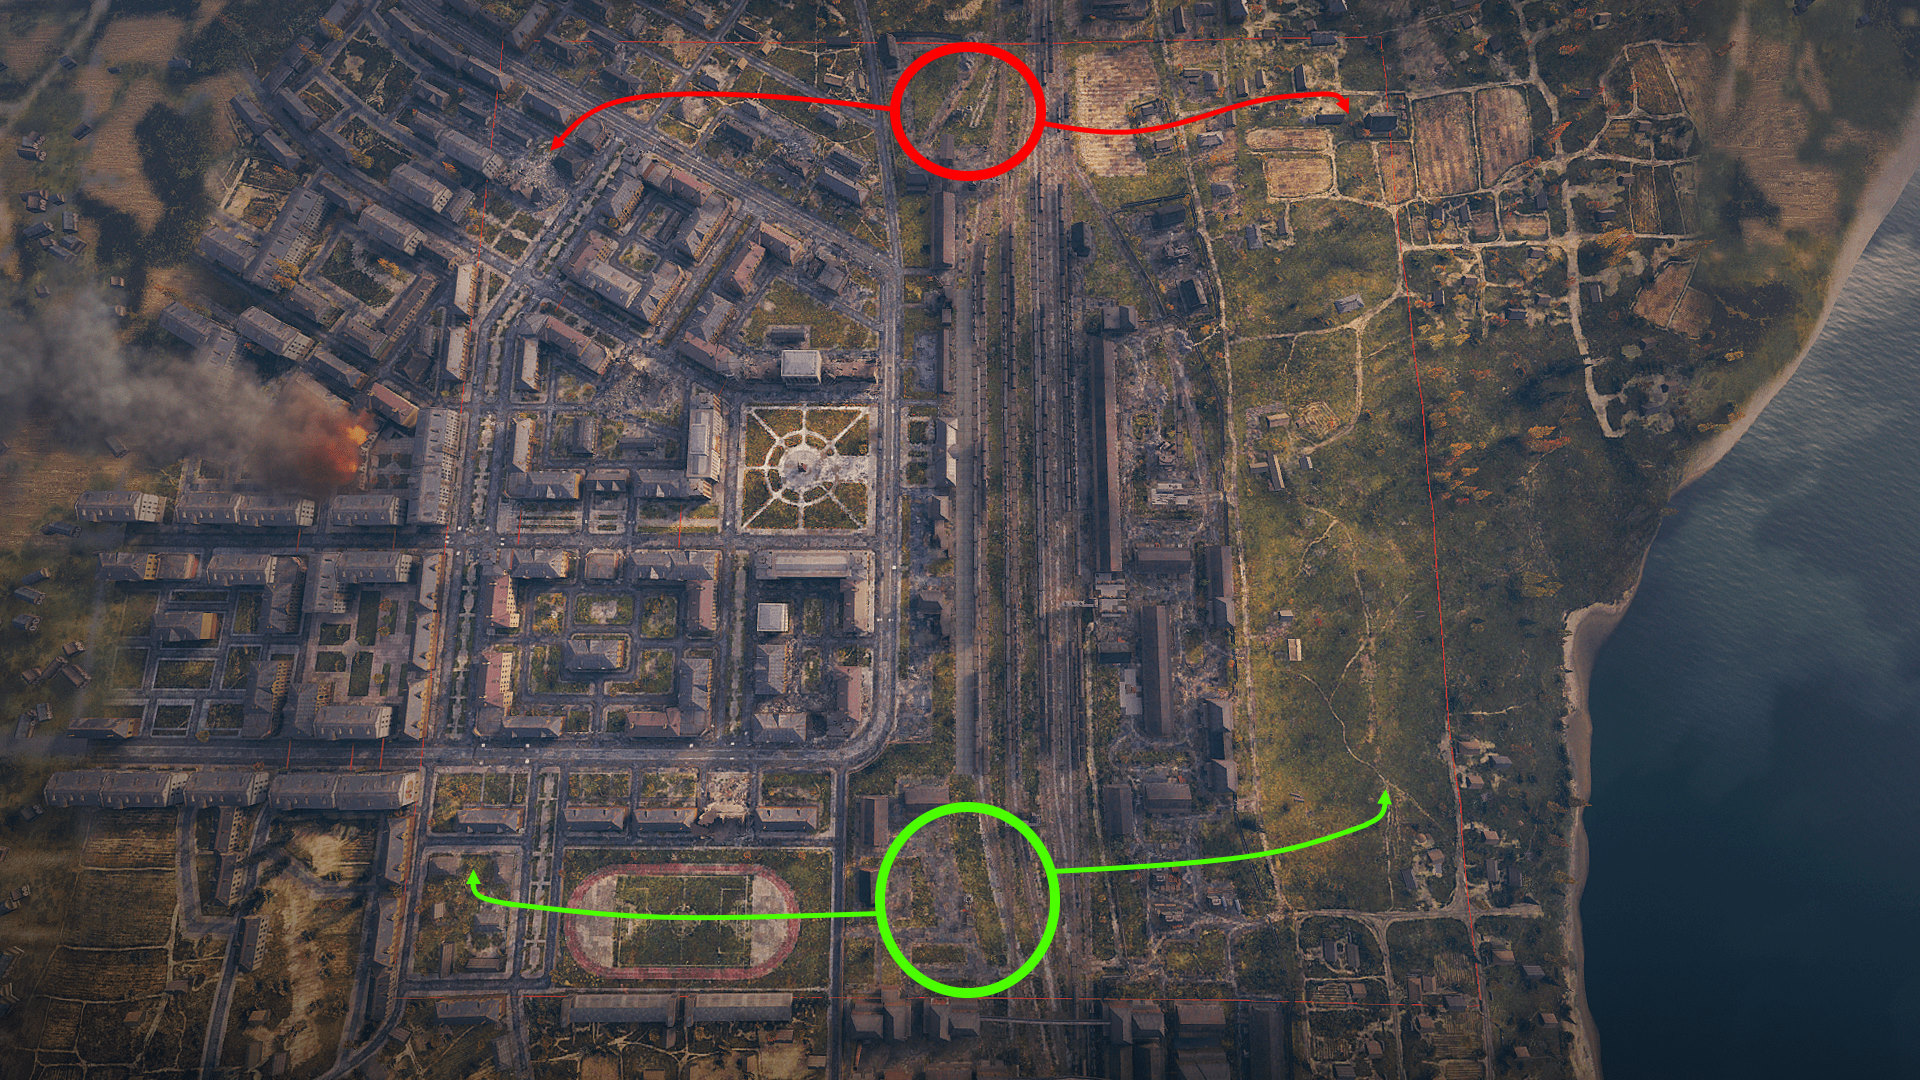
  • Head over to the northeast (C9) or southeast (H9) areas for spotting and sniping.
  • Light tanks with strong turrets have an added advantage of hulldown sniping in the east area.
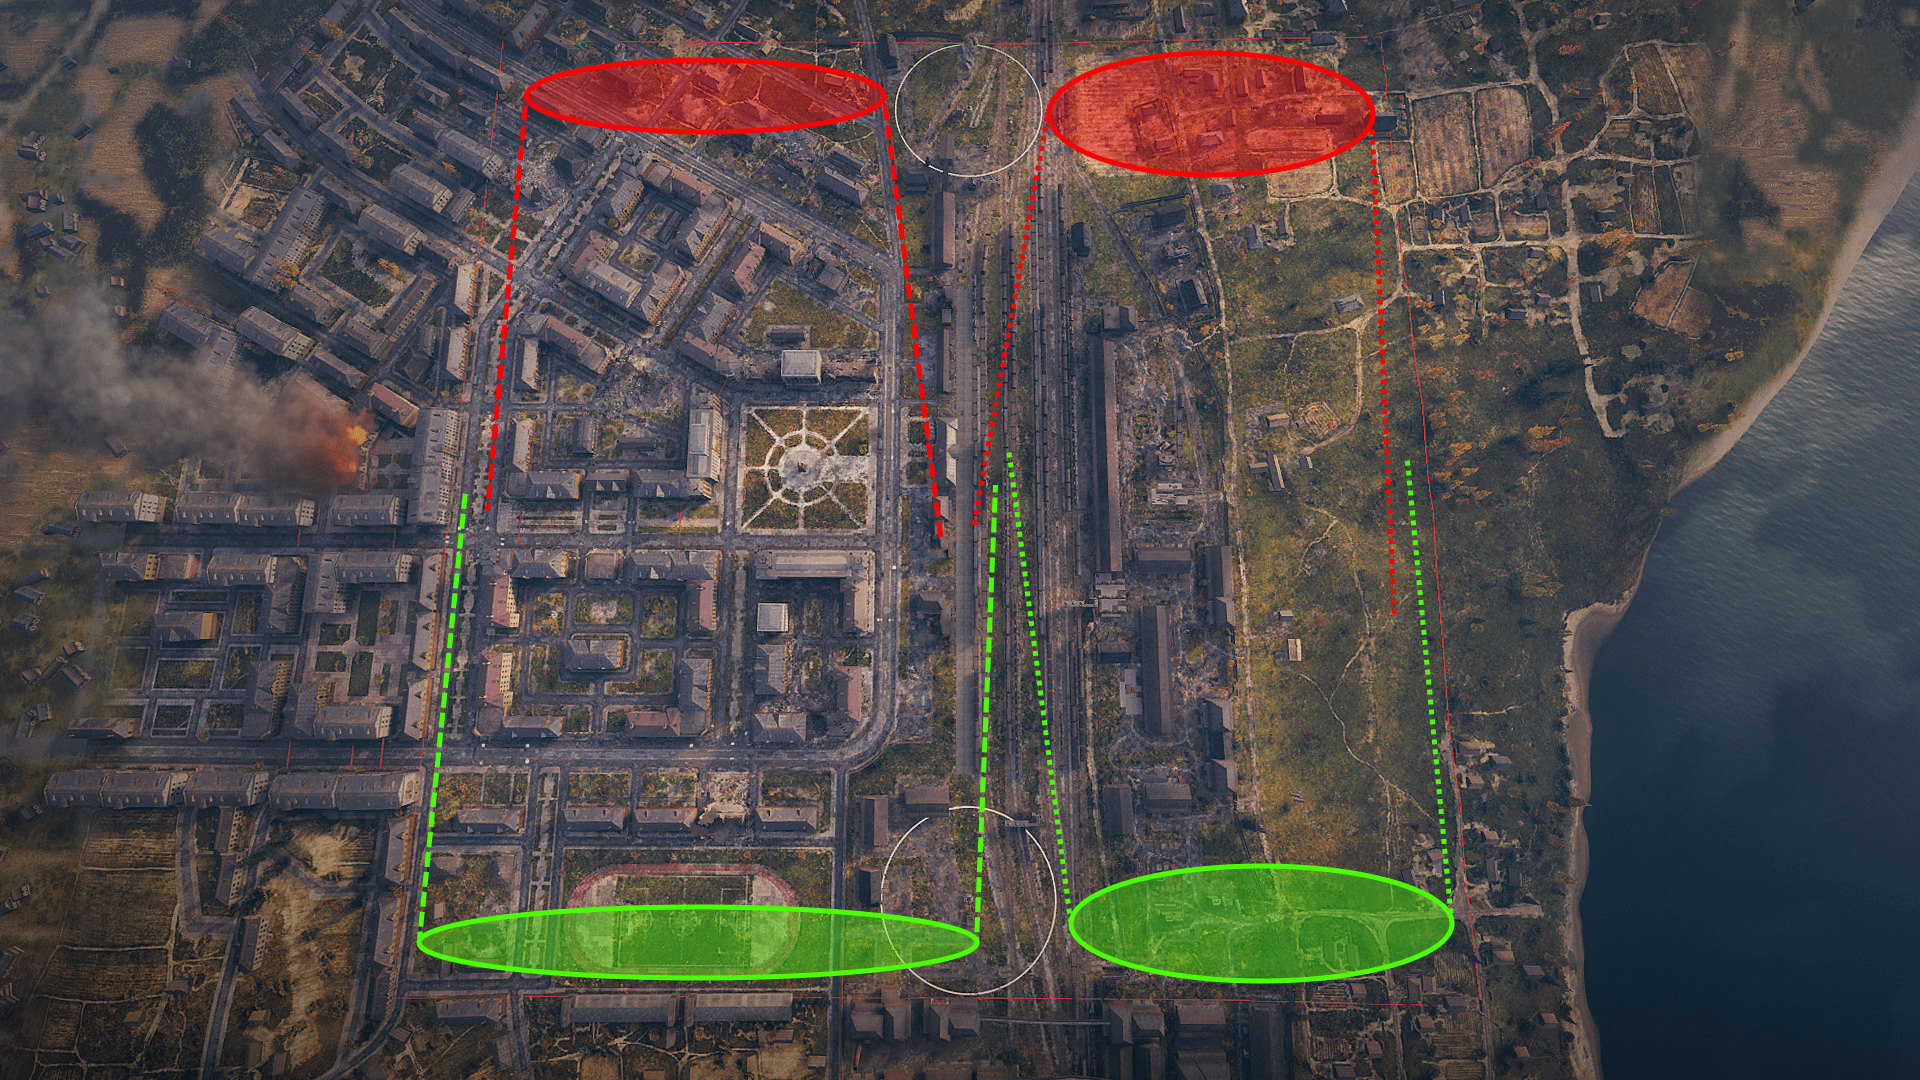
  • Use buildings (C1 or H1) for cover and keep an eye on activity on the 1 line.
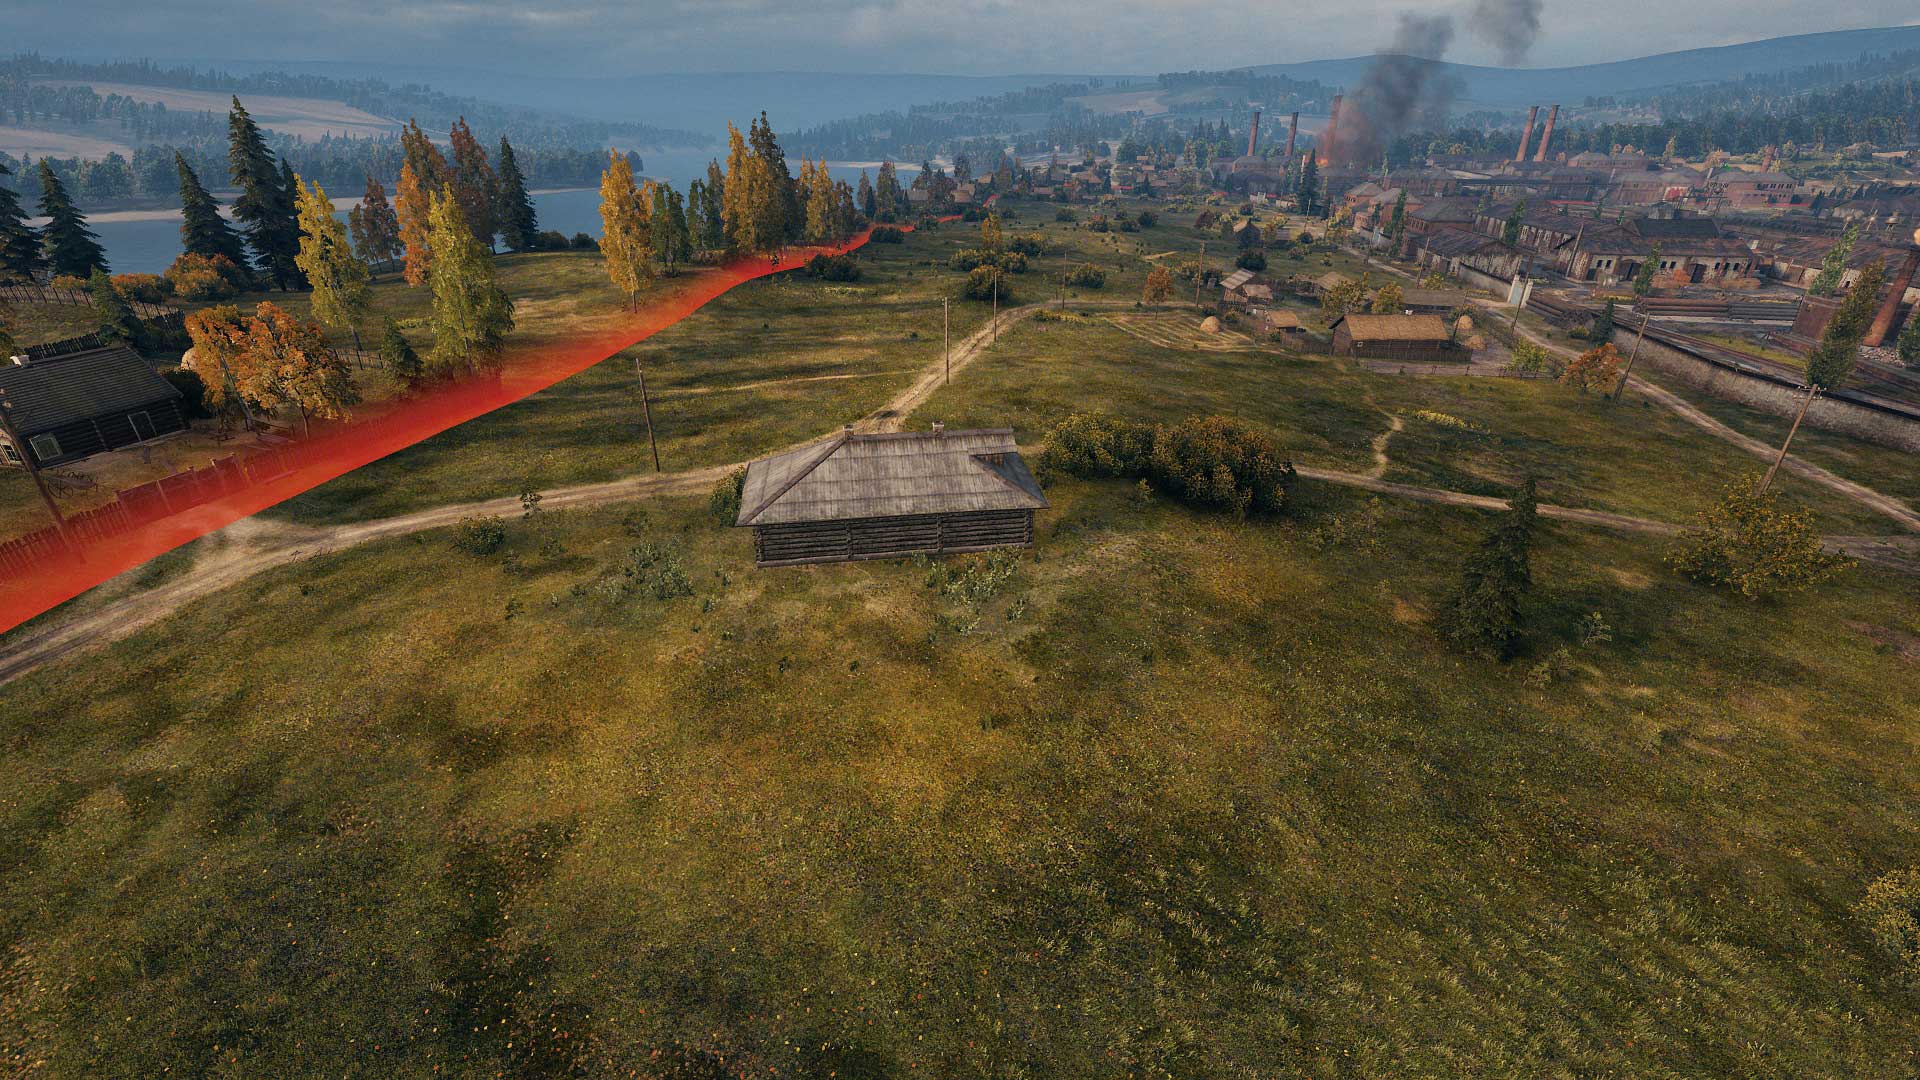
  • Support your teammates by using the house (D0) for cover or the hills (G0-H0) for hulldown positions.
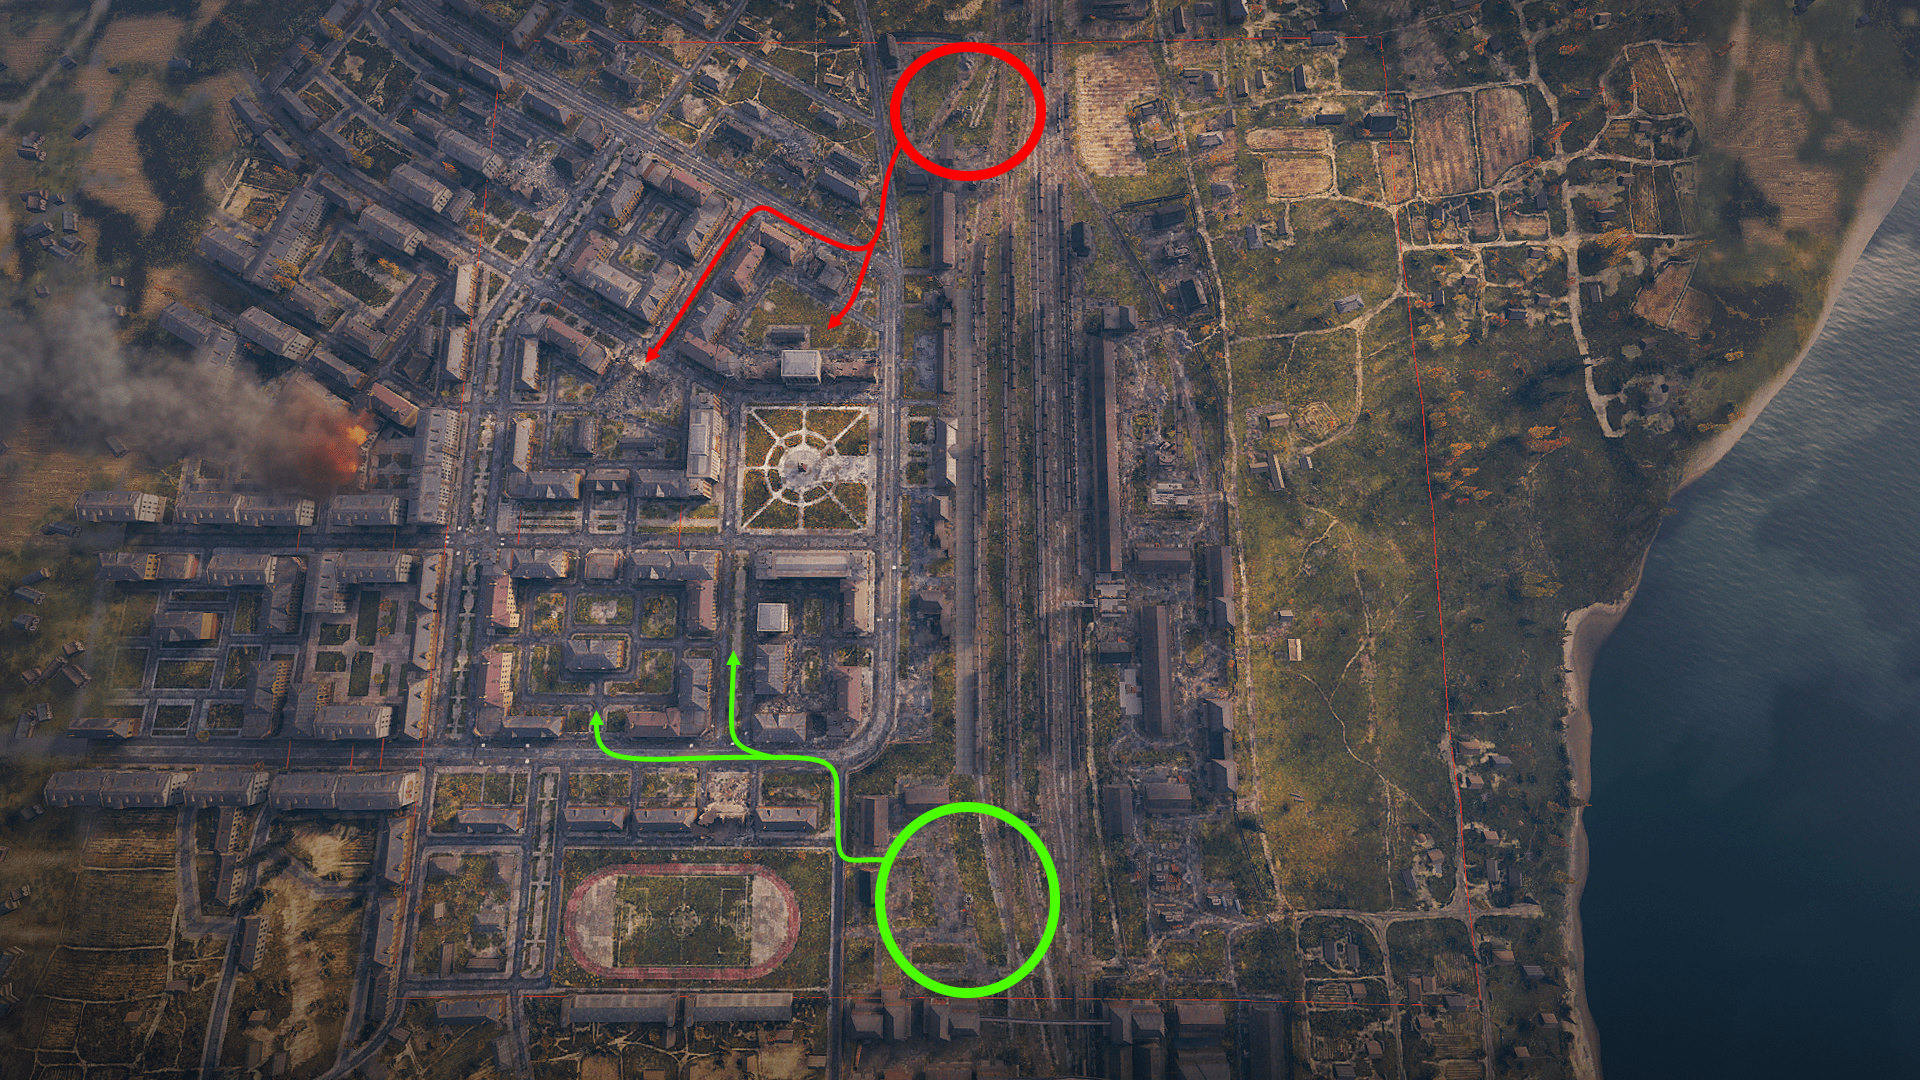
  • Head to the enclosed parts of the city (E2–F2), where fighting breaks out quickly.
  • City battles are all about alpha damage, side scraping, and hitting enemy weak spots.
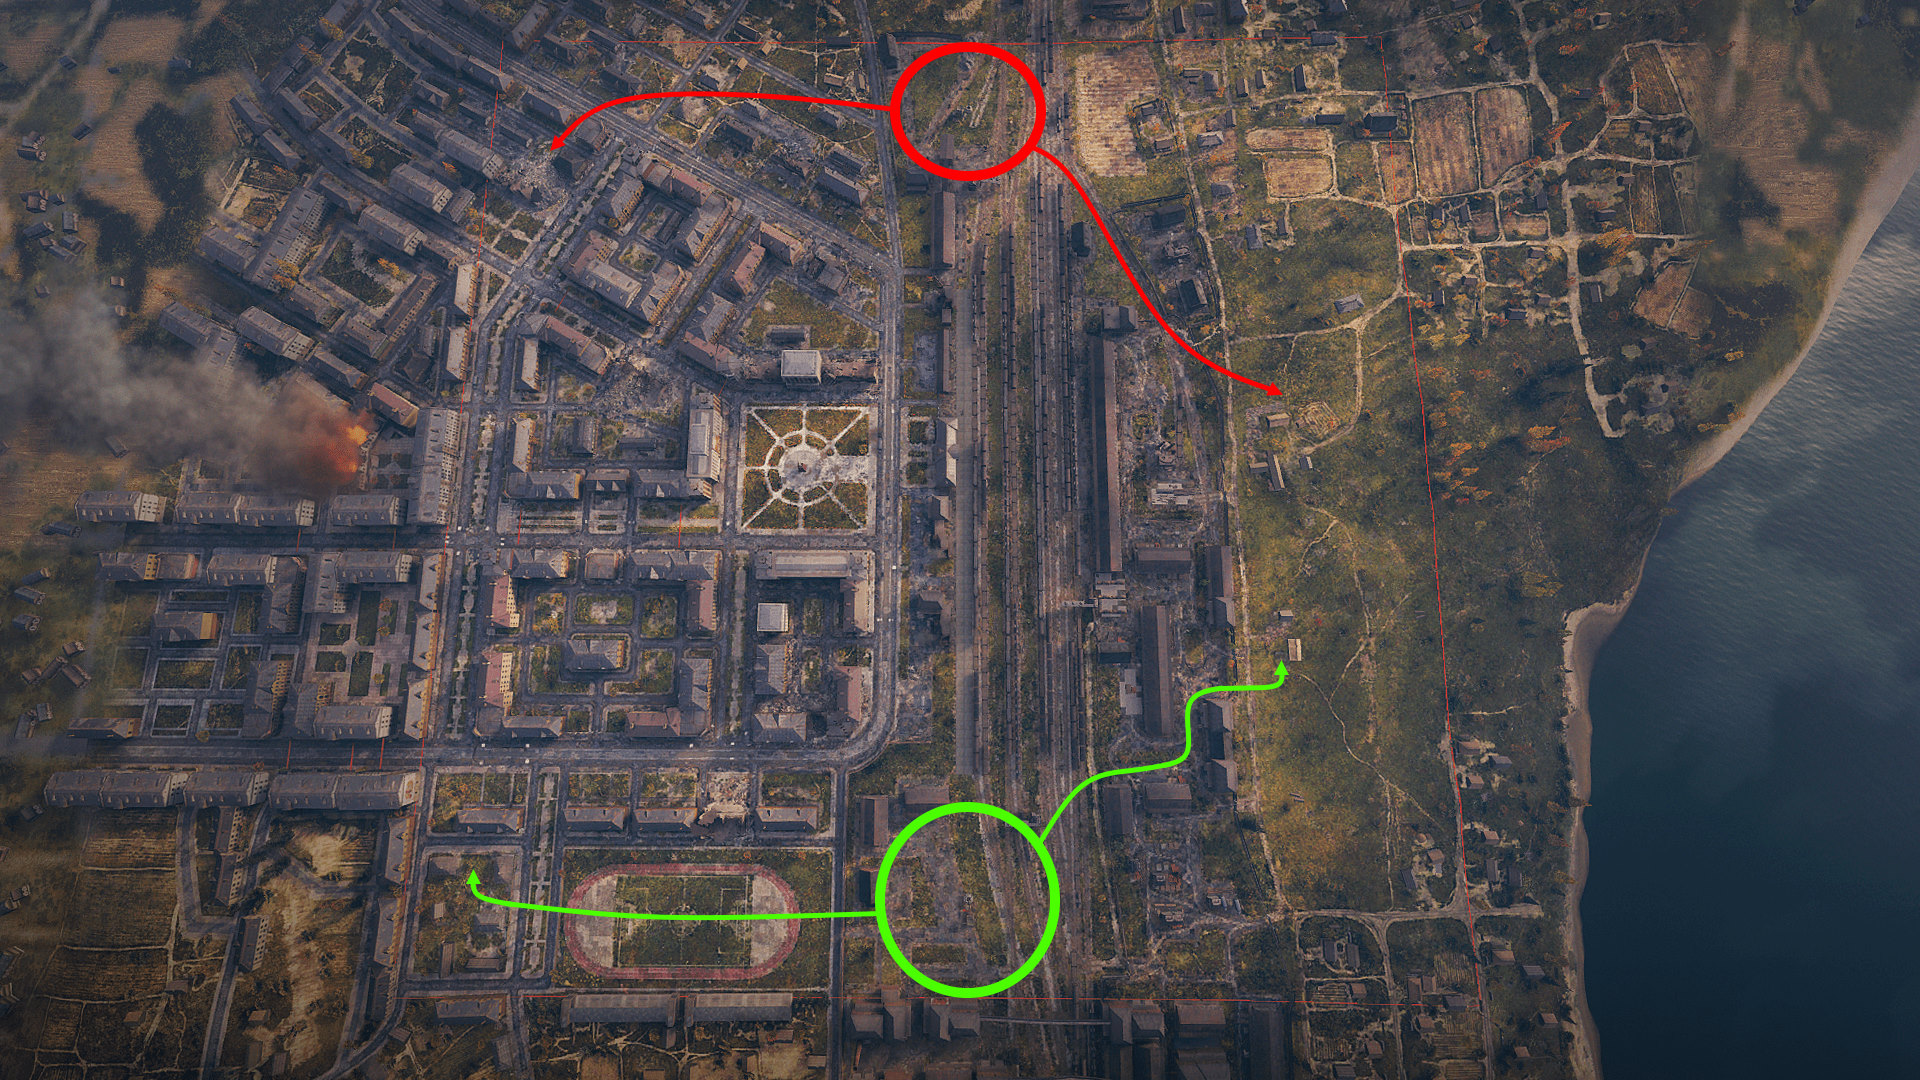
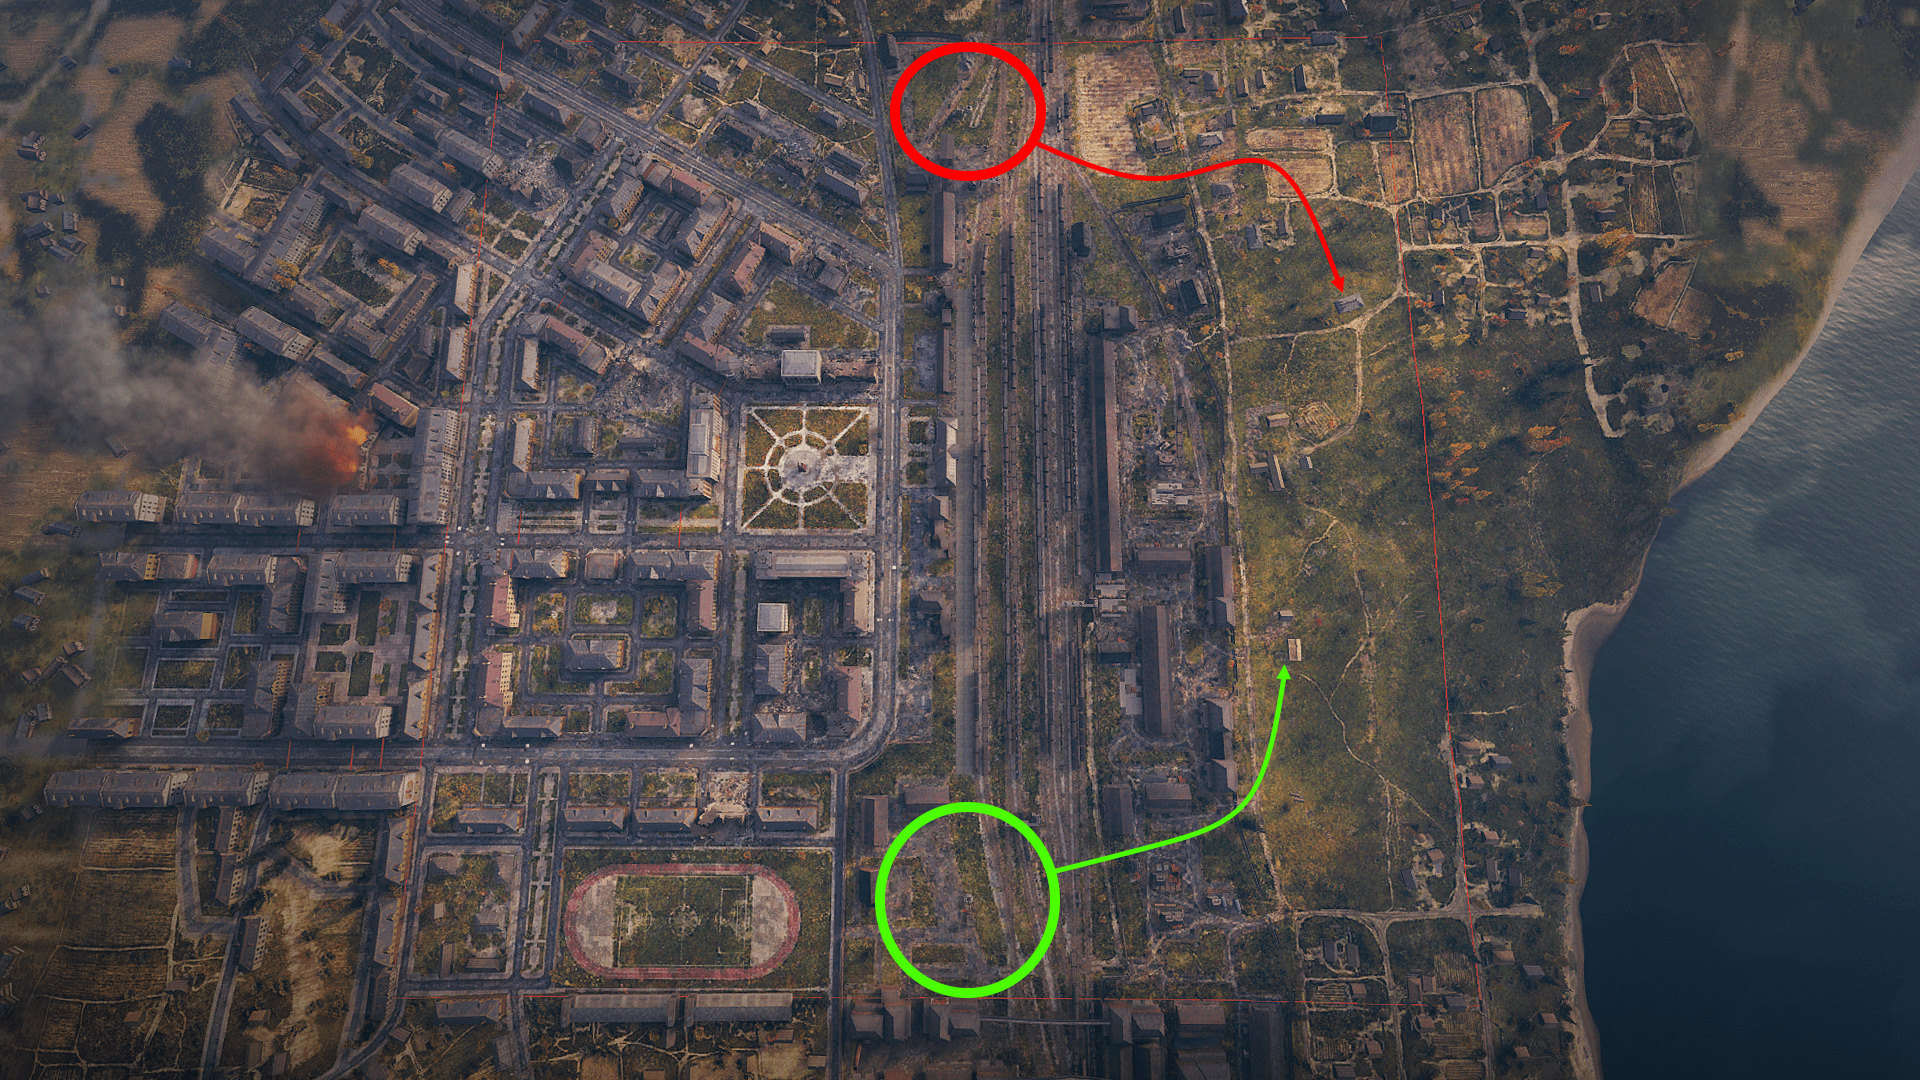
  • If you spawn from the north, windows (D4 and D5) provide sweet hulldown positions and sniping angles.
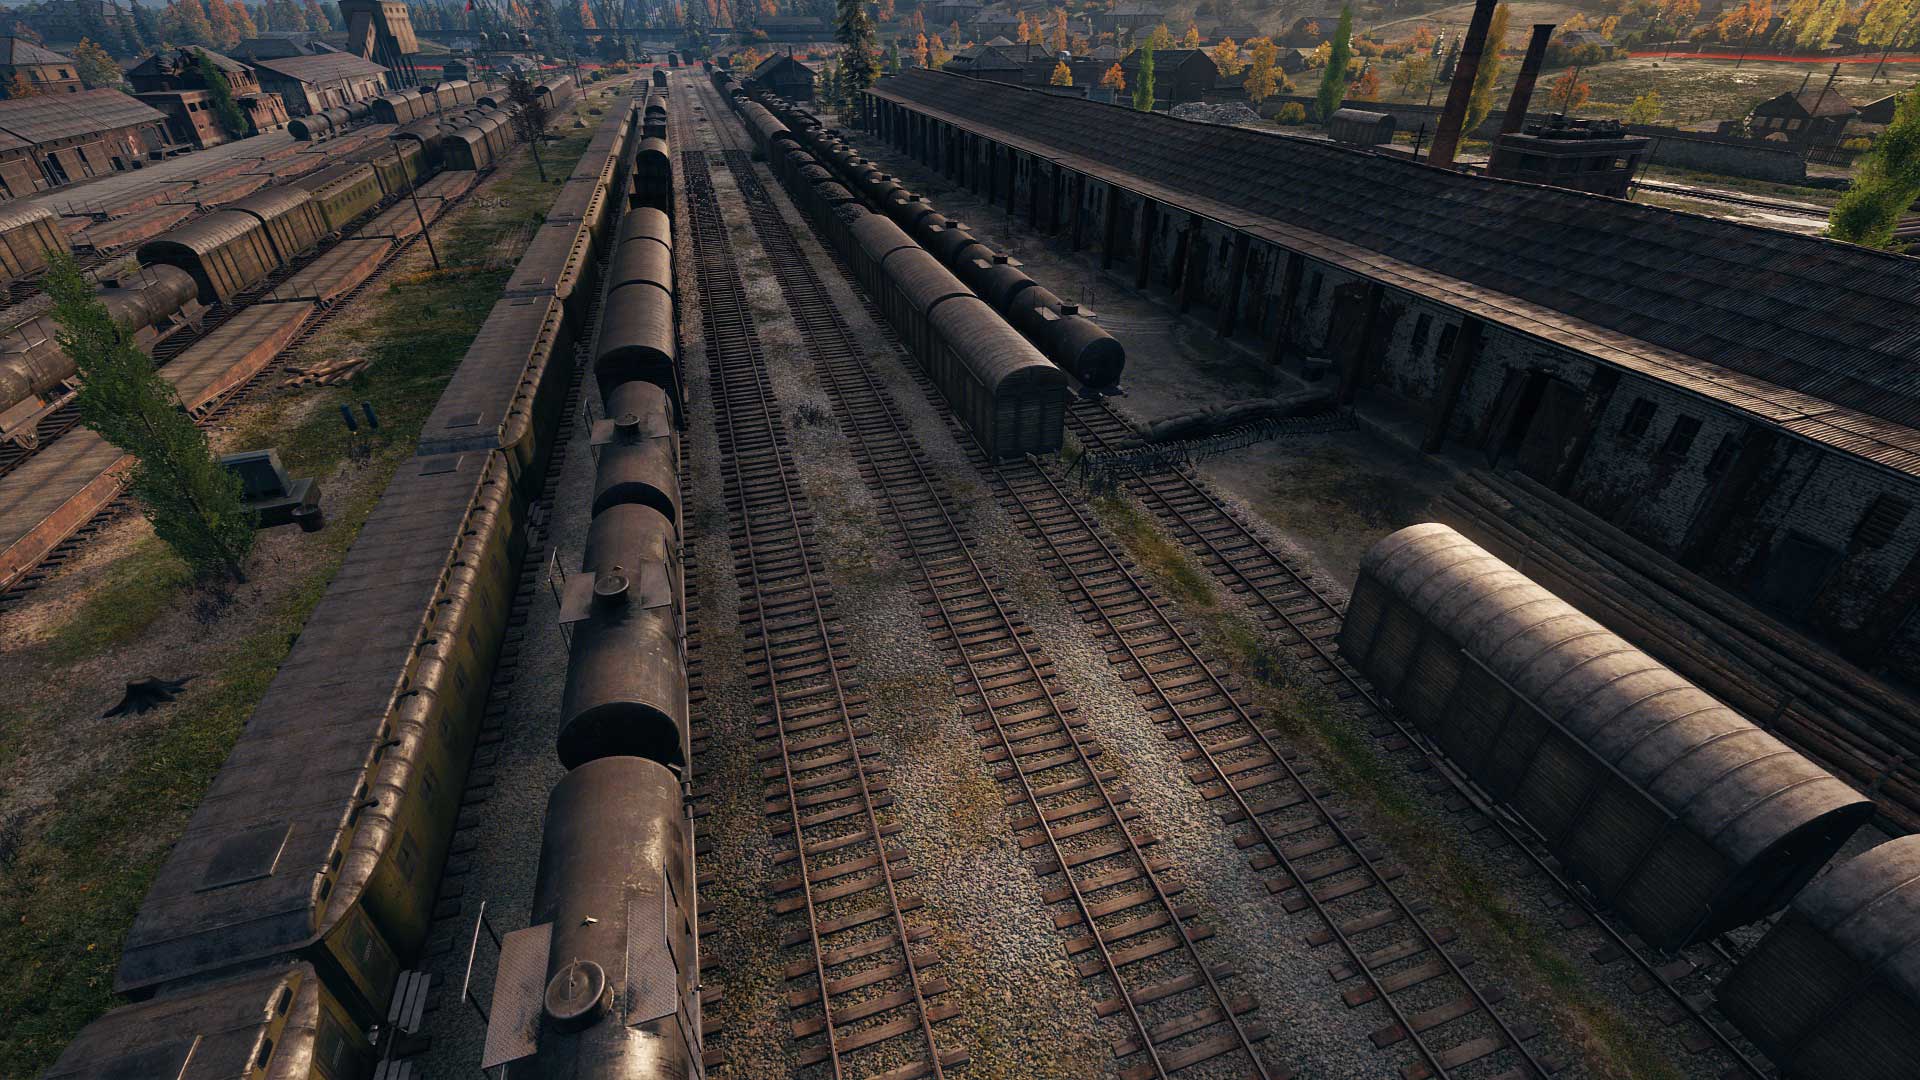
  • If you spawn from the south, take a direct route parallel to the rail cars (6 line): You can spot and shoot enemies crossing—but only if your vehicle has exceptional camouflage values or you possess good sidescraping skills. 
  • Have a look where the majority of your team is headed at the start of the battle game.
  • Play somewhere around the A or K lines (depending on where you spawn).


Find your path to victory and Roll Out!

Close