Commanders!
Last year, players had an opportunity to participate in three episodes of the Recon Mission event, which offered the chance to look at new maps in development and leave feedback. Recon Mission was a big success, with over 2 million players participating and over a million questionaries completed. We took our time to analyze this massive amount of data and are now ready to share the results with you.
Here’s a quick reminder of how the Recon Mission event worked
The event had three episodes, each featuring three new in-development maps. After playing a certain number of battles, players could pick their most liked and disliked map. Following additional battles on a map, players could complete a detailed questionnaire, which included personal feedback. While this was happening, we collected battle statistics for each map to help us analyze map balance.
CONTENTS |
|---|

Measuring the Data
The next step was to assign points based on the survey answers and create a second ranking of the maps. This offered unique insight into the maps from the subjective view of players. Finally, we compared this feedback against the objective data and statistics we collected with a view to finding any outliers.
For example, players said Outpost and Oyster Bay best facilitated tactical variety, while Volga was voted the least accommodating. A glance at the heat maps shows this was reflected in the data.
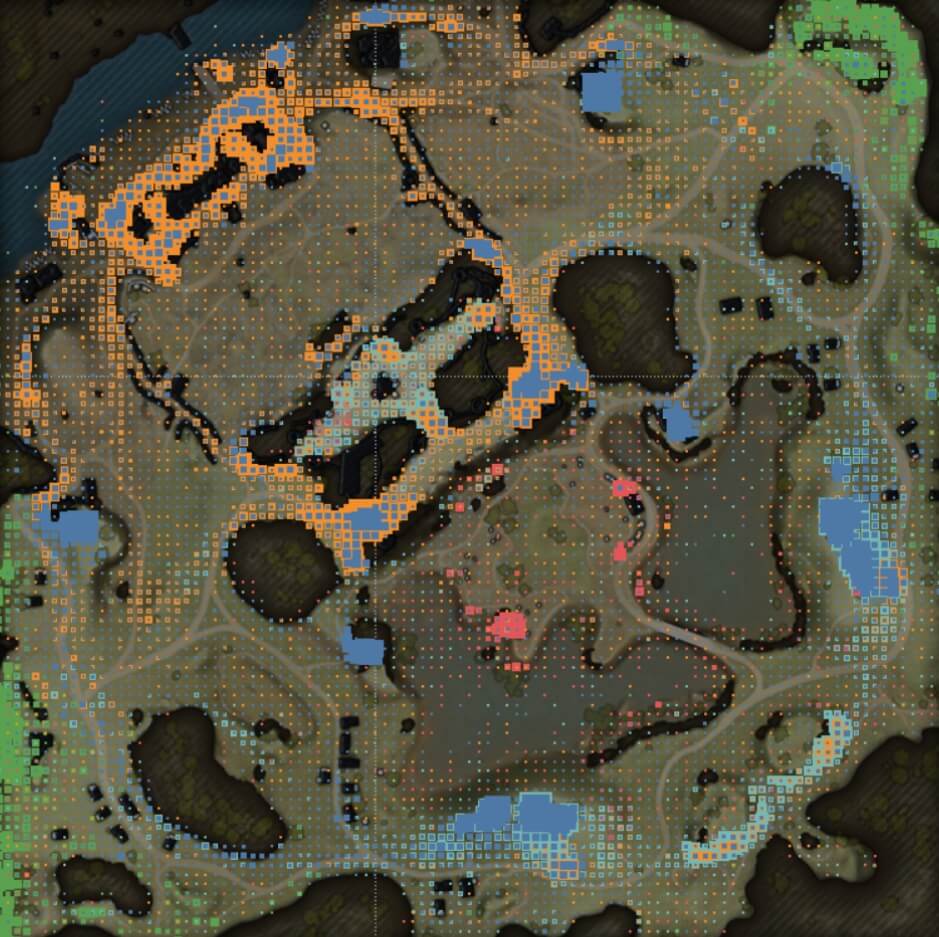 |
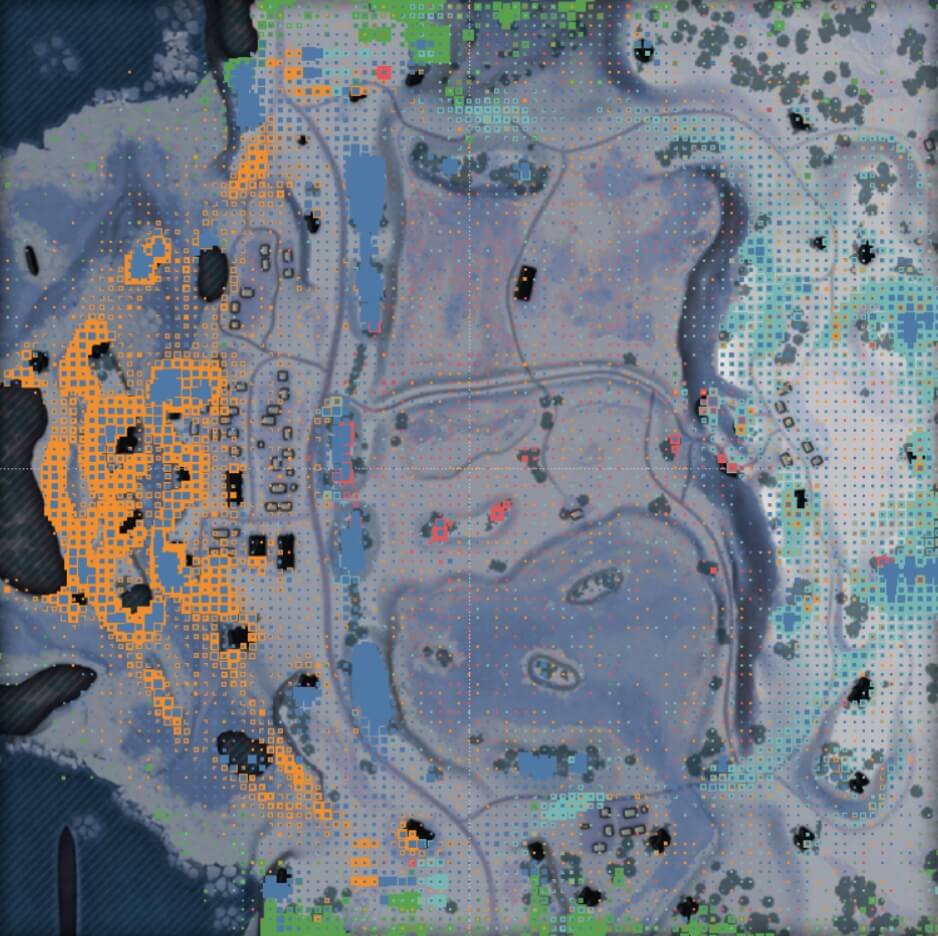 |
| Outpost heat map | Volga heat map |
On Volga, heavy and medium tanks heavily favored a single direction, yet on Outpost, they chose from at least two paths.
Nobody likes being struck by a self-propelled gun, and players said Oyster Bay offered the most cover from aerial attacks, with Volga providing the least protection. The heatmaps show how SPGs on Volga had free rein to target almost any location without needing to relocate, yet Oyster Bay demanded greater planning and positioning to besiege a given spot.
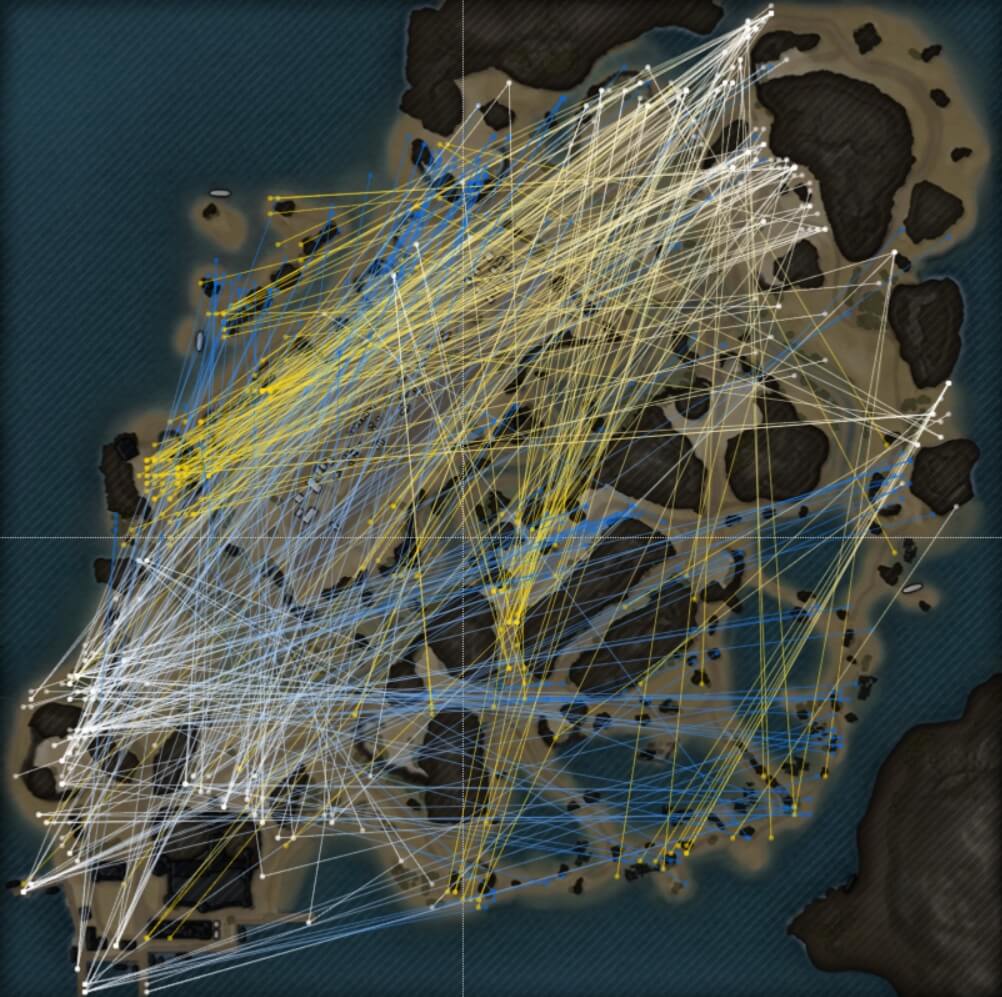 |
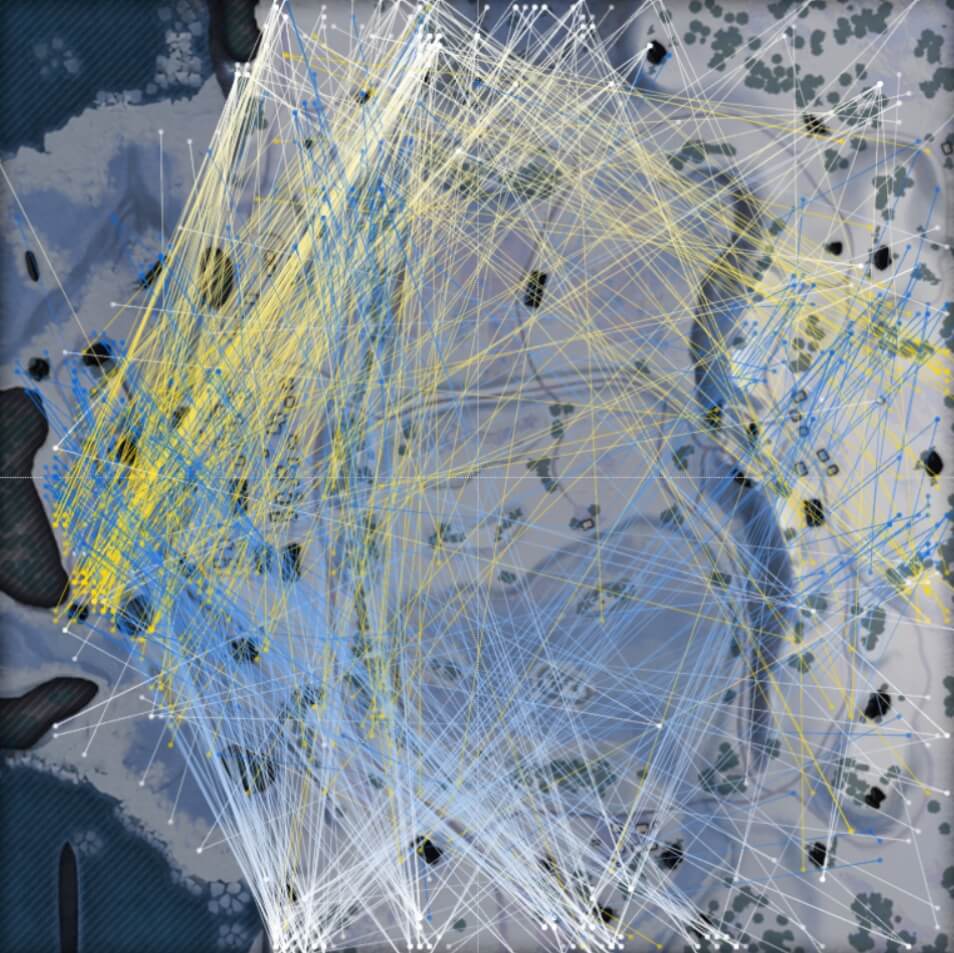 |
| Registered SPG hits: Oyster Bay | Registered SPG hits: Volga |
But the data doesn’t always align, as seen when reviewing which map was most suitable for light tanks. Players voted Far East as their most suitable and Airshipyard the least convenient map for light tanks, however, the average battle XP statistic showed that light tanks did very well on Airshipyard. After accounting for those interesting results and player feedback, Airshipyard lost a few places in the rankings used to determine which maps we should develop further but still remained in the top four.
The Results
After examining all questions and sorting maps with the help of player votes, these are the maps that stood out as the strongest:
- Outpost
- Oyster Bay
- Far East
- Airshipyard


The city ruins are perfectly suited for heavy tanks, while two levels of terrain here allow for dynamic encounters.


The fortress and outpost on the hill are rather risky to get to, but a team that captures this area can practically control the entire map.


This is an open area that allows for maneuvering and long-range shots. It is suitable for light-armored vehicles, as well as for vehicles with good elevation/depression angles.


The trenches along the fields allow for switching directions between the castle and the city.

The trenches along the fields allow for switching directions between the castle and the city.


The north beach is a fairly open area. This area is the domain of fast and maneuverable vehicles moving from cover to cover.

The river passing through the center of the island is quite exposed to enemy fire from various positions on the map. This is a risky path behind enemy lines.

Massive cliffs provide excellent cover from SPG fire, allowing slow and heavily armored vehicles to effectively push through enemy defense lines in this direction.

The sandy spit in the south is a convenient place to cover heavy vehicles fighting among the rocks.


Sniper positions to provide fire support to allies.

Sniper positions to provide fire support to allies.


The presidio over the river stretches along the entire flank, which allows heavy tanks to advance practically up to the enemy base. Besides this, its structure allows for unexpected flanking maneuvers.

The river bed and the mining area in the center are rather dangerous. Light tanks can spot enemy vehicles from here.

There is a tunnel under the takeoff strip connecting the map flanks.

The mountain terrain allows for approach from all directions. A team that captures the mountain can see the entire map and fire at enemy vehicles far away. This area is best suited for medium tanks, as well vehicles featuring good elevation/depression angles and a sturdy turret.


Destroyed hangars provide good cover positions for heavily armored vehicles protecting them from both enemy artillery and flanking attacks.

The fallen zeppelin in the map center is a good position for spotting enemy maneuvers and keeping track of them during the entire battle.

The territory behind the railway is perfect for maneuverable vehicles, as well as for vehicles with thick turrets and good elevation/depression angles. The enemy SPGs can cover this area with their shots, so make sure to keep moving.

Vehicles at these sniping positions can prepare a warm welcome for enemy vehicles approaching the bases. They can also prevent fast vehicles from rushing through the center of the map.

Vehicles at these sniping positions can prepare a warm welcome for enemy vehicles approaching the bases. They can also prevent fast vehicles from rushing through the center of the map.

These side tracks will help the defenders retreat safely from the hangars. At the same time, the attacking side can push enemy snipers from here.

These side tracks will help the defenders retreat safely from the hangars. At the same time, the attacking side can push enemy snipers from here.
