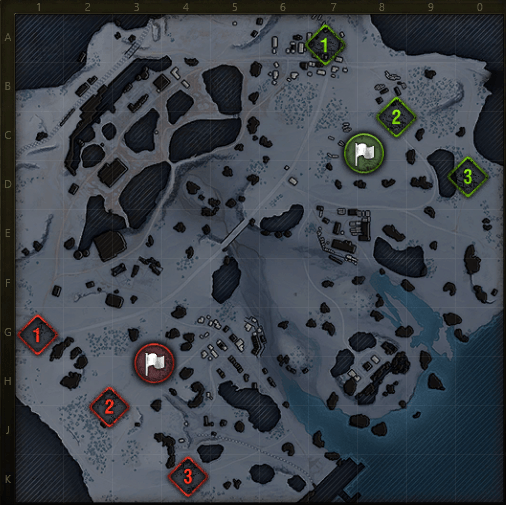
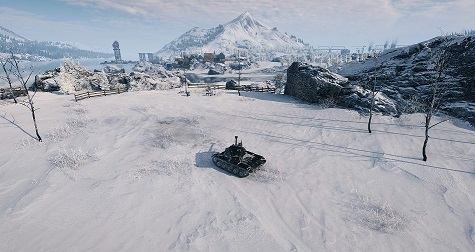
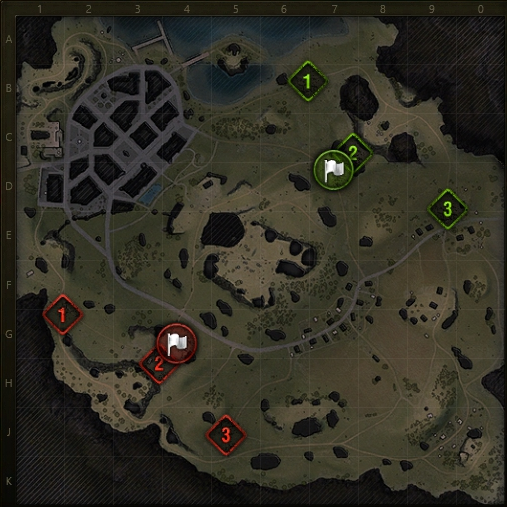
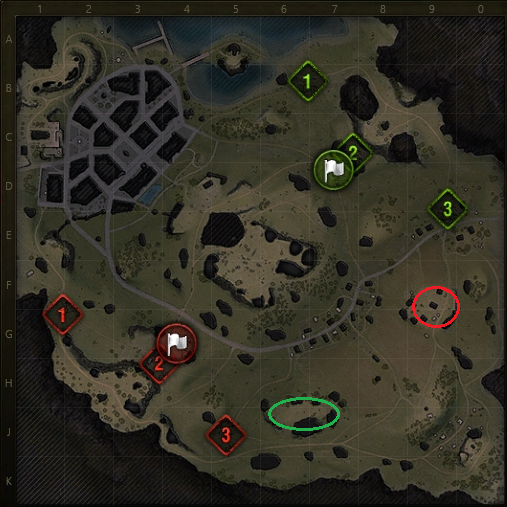
- Spawn point 1
- Spawn point 2
- Spawn point 3
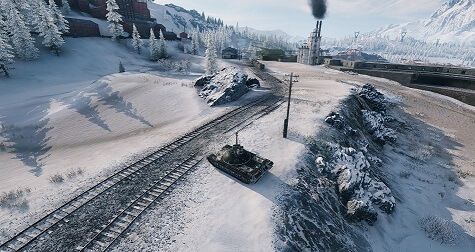
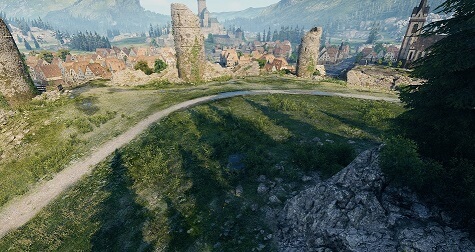
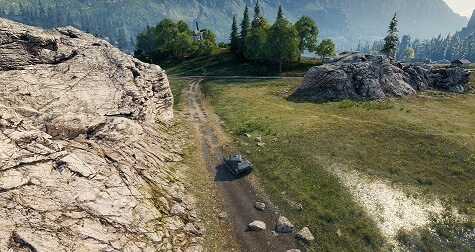
The heaviest tanks should climb up the north-western side (D2 and B4). Do not attempt to rush through the narrow cliffside (north-west of the bridge) at the start of the game. You will be spotted early, and – without any cover – eliminated instantly.

Light and medium tanks can climb the hillside here to gain favourable angles and the high ground.
North:
South:
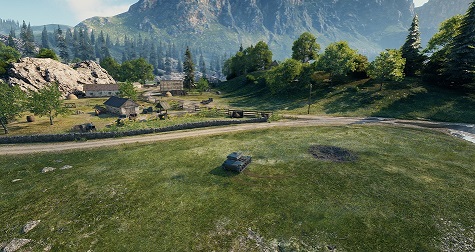
Ideal for medium tanks. Numerous bushes and their concealment allow you to fire at the enemy defences and put pressure on enemy tanks in the centre of the map. The terrain is rough enough for hull-down tactics and to hide from enemy artillery. Tanks in this position must advance quickly towards enemy territory if their defence line falls.
The second line has the high ground and good protection, so it’s ideal for tanks with tough turrets/superstructures.
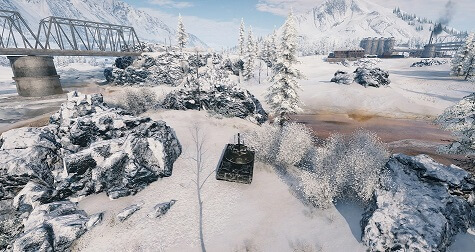
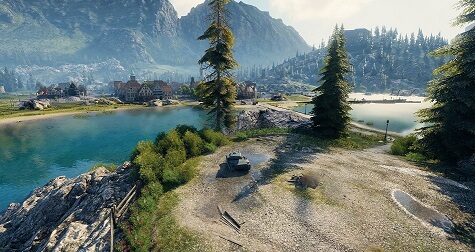
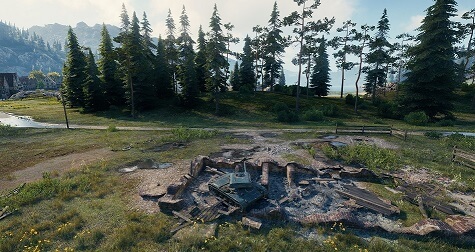
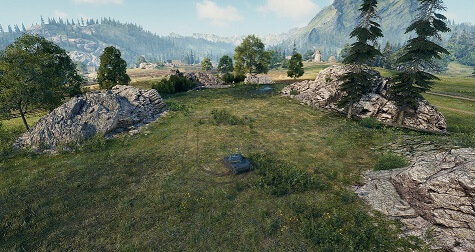
This area features multiple paths, flat terrain and steep cover, so there’s no way to protect your hull. The heaviest tanks can use their tough frontal armour and side-scraping. Teams can use vantage points to fire at almost all defensive positions around the enemy team’s base.
Faster tank destroyers and heavy tanks should move to the high grounds and push through the main path, taking advantage of their strong frontal armour. While the area is mostly flat, there are two small elevations that allow for hull-down tactics or second line fire support. Winning this flank allows you to overwhelm the lower line.
Faster tank destroyers and heavy tanks should move to the high grounds and push through the main path, taking advantage of their strong frontal armour. While the area is mostly flat, there are two small elevations that allow for hull-down tactics or second line fire support. Winning this flank allows you to overwhelm the lower line.
The second line has the high ground and good protection, so it’s ideal for tanks with tough turrets/superstructures.
From this starting position you can reinforce either the western or eastern flank. Since you’ll be arriving later than your allies/enemies, focus on the fronts that need help the most. There are a few sniping positions to choose from to cover your teammates who push towards the centre of the map.
Firing positions around the spawn area may look convincing but they’re too far from the middle of the map and you won’t be able to shoot anybody. It’s important, however, to retreat towards them if one of your flanks falls, so always check your map and react in advance!
If you consider staying in the urban areas near the centre of the map, make sure you’re quick enough to peek out for snap shots, else you’ll get spotted and shot at from different angles.
If you consider staying in the urban areas near the centre of the map, make sure you’re quick enough to peek out for snap shots, else you’ll get spotted and shot at from different angles.
You can shift here from one side to the other to shoot towards the centre of the map or the bridge, depending on enemy advances.
You can shift here from one side to the other to shoot towards the centre of the map or the bridge, depending on enemy advances.
Recommended positions for squishy high-damage dealers. Support your allies in the urban areas ahead and in the centre of the map.

Recommended positions for squishy high-damage dealers. Support your allies in the urban areas ahead and in the centre of the map.
The eastern flank features multiple passages on the front line, so it’s especially important to advance along with your teammates. Keep an eye out on the numbers of enemy artillery, because the centre of the map doesn’t offer much cover and you will be under constant barrage there.
This position is recommended for vulnerable tank destroyers with superior accuracy and camouflage values.
This position is recommended for vulnerable tank destroyers with superior accuracy and camouflage values.
Ideal for second line support vehicles with better armour, since they are at higher risk of being revealed.
Ideal for second line support vehicles with better armour, since they are at higher risk of being revealed.
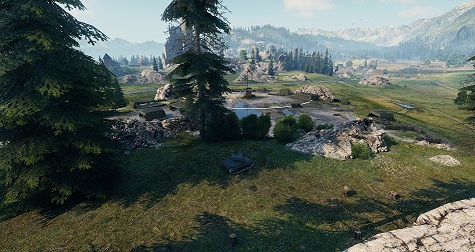
The irregular terrain in this area accommodates medium tanks with good gun depression angles (-8° or better) and active scouts. From here you can contest the hill in the open area in the centre of the map. If this front succeeds at destroying the enemy's second line, the tanks occupying the enclosed elevated area can then flank the coast and overwhelm the whole side of the map.
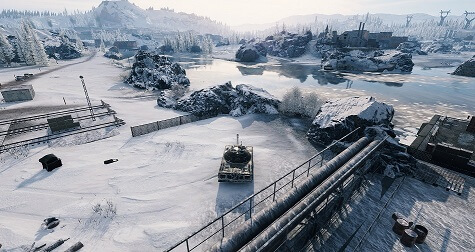
This elevated area is a strategic position which should be contested at the beginning of the game by the fastest tanks. It offers a wide-angled concealed vantage point which helps in detecting the enemy second line and also contains a ramp for both teams, which can be used to instantly flank enemy tanks at the coast after the second line defenders have been dealt with.
The most optimal choice for bulky heavy tanks and tank destroyers. Small terrain elevation and single shoot-through allows combat for vehicles with superior front armour and small depression angles. Keep an eye out for your teammates, because this line is at high risk of flanking. Remember that the shallow waters can be traversed as well. It is important to secure all three pathways to successfully advance on this flank.
- Spawn point 1
- Spawn point 2
- Spawn point 3
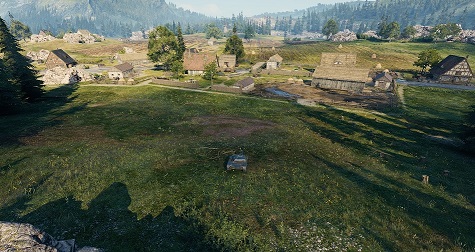
Your main objective here is to secure the north-western hill and in turn the city, before pushing towards the second enemy line. Fast heavy and medium tanks should try to claim the hill, while heavily-armoured vehicles can be the most effective in the city.
From here you have clean shot at the enemy advancing around the castle. You’re too far from the top-western front line to shoot there, so keep on moving if you are not useful here. If you rely on camo, you might want to relocate to the forest just next to this position.
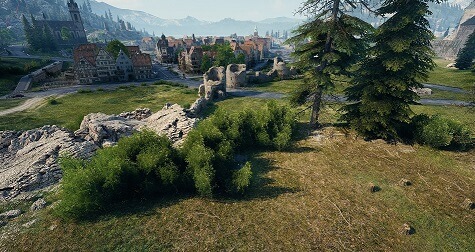
From here you can support your allies on the hill in the top-left corner, as well as cover a few streets in the city. Lots of vegetation allows you to stay concealed.
From here you can support your allies on the hill in the top-left corner, as well as cover a few streets in the city. Lots of vegetation allows you to stay concealed.
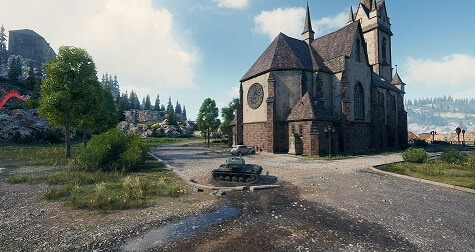
The lower path allows you to flank the enemy team above, but first you will have to deal with enemy tanks at the church. Make sure you have a plan before advancing, because if you move past this point, you will be exposed to enemy fire from sectors E1 and E4.
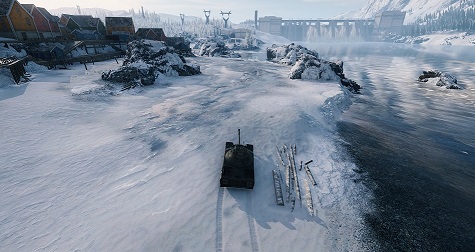
The lower path allows you to flank the enemy team above. You can reach the point here and stay relatively safe. If you decide to move past this line, make sure you won’t be demolished by enemy snipers on the island in sector A5.
Contesting this location is both important and difficult. Whichever team climbs to the top first, will be exposed to enemy artillery fire. Lack of bushes won’t help you stay undetected, but there are a few hard covers that allow taller tanks to fire in a hull-down position. Keep in mind that though you can see the central castle clearly, your draw range doesn’t quite reach the ramps there.
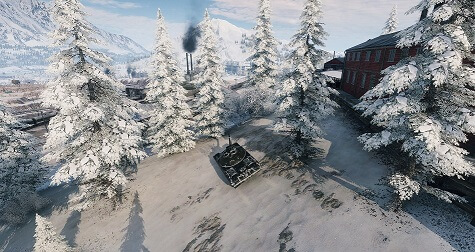
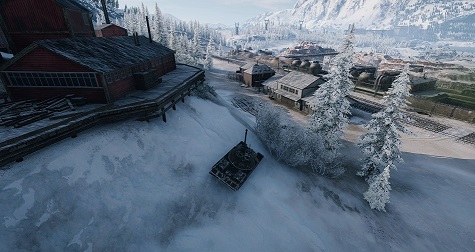
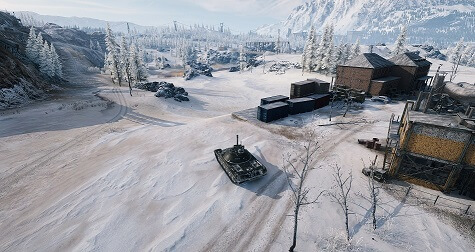
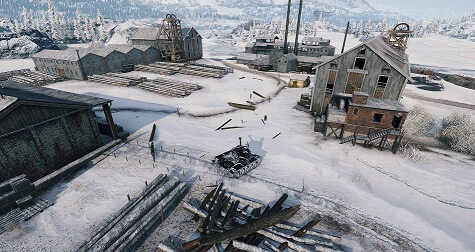
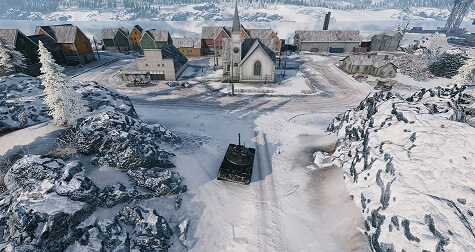
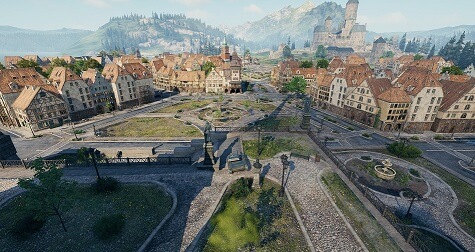
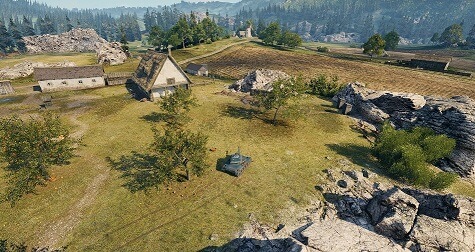
The city belongs to heavy tanks and front line tank destroyers. There isn’t much debris lying around, so you’ll have to rely on side-scraping and baiting enemy shots. You won’t have to worry that much about artillery here and there are many shoot-throughs toward enemy positions.
From here you can cover your allies if the enemy pushes on either of the pathways on the hill. While it’s possible to shoot at enemies in the city, it will leave you completely exposed so try to avoid that.
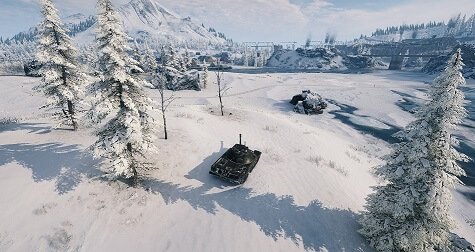
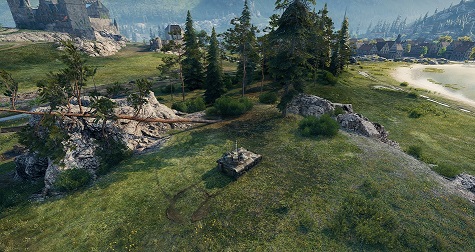
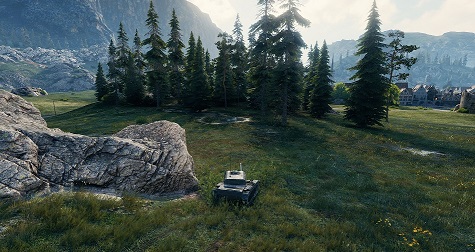
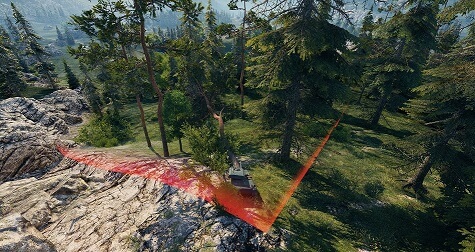
This forest offers a huge boost to your camouflage values, so you can provide second line fire support while remaining concealed. It’s also possible to sneak to the enemy forest (E3) to flank their defences.
This forest offers a huge boost to your camouflage values, so you can provide second line fire support while remaining concealed. It’s also possible to sneak to the enemy forest (C5) to flank their defences.
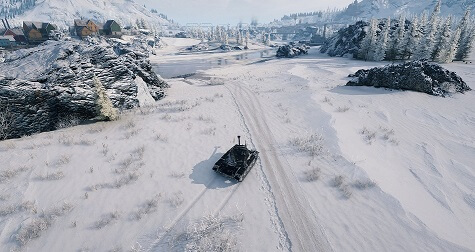
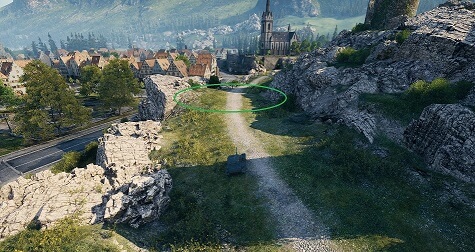
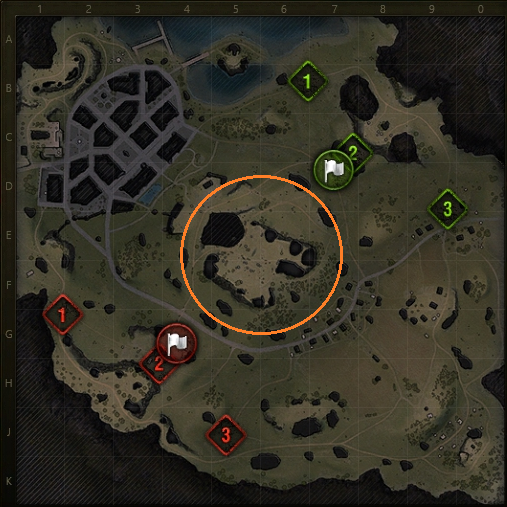
The hill in the centre is the most important strategic location on the map, so if you have a powerful engine, race towards it and try to gain control. If you command larger heavy tanks and camouflage is not your asset, then you can move around the central hill and jump between the hill and the ring of defences (orange circle).
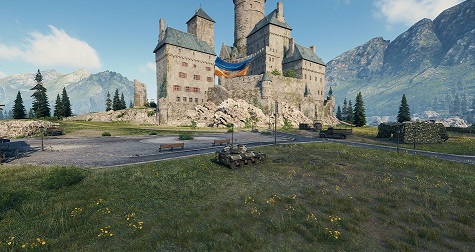
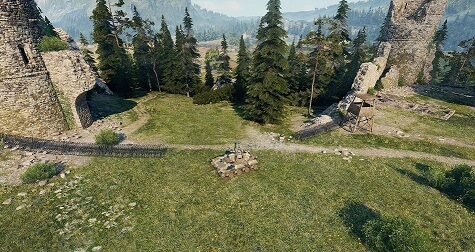
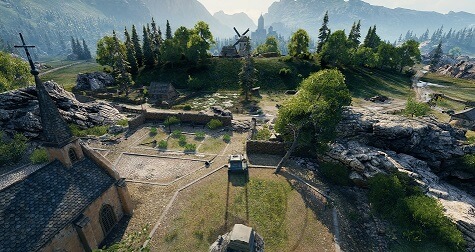
Two of the three entrances to the central hill are located around this castle. At the start of the battle, you can safely reach the castle undetected. You’ll need decent gun depression to fire at the enemy on the hill in hull-down position. If you secure this area, you can switch to the outer defences (orange ring) and shoot at enemies in the top-western part of the map.
- 1. There’s a lot of cover, but almost no vegetation on the ledges. You need to rely on camouflage and view range to spot the enemy early. Only recommended for light and medium tanks.
- 2. Be mindful of the elevated position near the enemy base; it’s packed with tank destroyers waiting for you to make a mistake. Make sure to have a way out if the enemy advances on your position; if they see you behind a rock, it's game over.
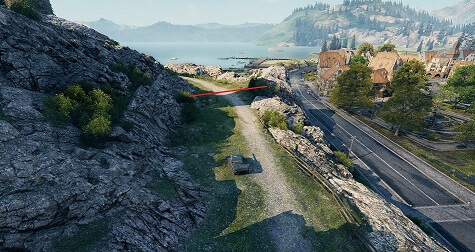
- 3. It takes about a minute for the fastest enemy destroyers to reach their sniping position in sectors H3 or C8, so as a passive spotter you may try to spot them from the ledge here as they arrive.
The layout and location of this area is quite self-explanatory — it’s designed for tank destroyers. You are at the same height here as the flat plateau in the centre of the map, so you can shoot everything there as long as it’s not behind cover. You should consider two important criteria before moving here:
- 1. Your drawing range only allows you to shoot towards the centre of the map or at advancing enemy from either of the flanks.
- 2. It takes some time to reach this area (as much as for spawn points 1 & 3), especially for cumbersome tank destroyers.
If you expect one of your flanks to fall early or your team needs help in the middle, stay here. Otherwise move out and join your team where they need you the most.

The layout and location of this area is quite self-explanatory — it’s designed for tank destroyers. You are at the same height here as the flat plateau in the centre of the map, so you can shoot everything there as long as it’s not behind cover. You should consider two important criteria before moving here:
- 1. Your drawing range only allows you to shoot towards the centre of the map or at advancing enemy from either of the flanks.
- 2. It takes some time to reach this area (as much as for spawn points 1 & 3), especially for cumbersome tank destroyers.
If you expect one of your flanks to fall early or your team needs help in the middle, stay here. Otherwise move out and join your team where they need you the most. Remember to climb the hill from the southern side, it's faster.
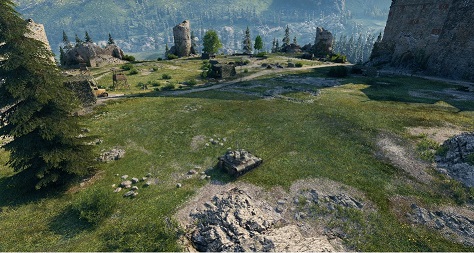
One of the three entrances to the hill. The sloped entry allows you to use hull-down tactics against the enemy on the plateau as long as you have good gun depression. The large forest area supports all vehicles with high camouflage value. Advance with caution, as camouflage is your only protection here.
We advise you to wait a few minutes first to let each team position themselves. If you manage to find a gap in enemy defences, then you can flank the second enemy line and turn the tide of battle. Extremely risky.
The strategy here is quite straightforward: contest the corner of the map, then support your allies on each passageway to win this flank.
Obvious choice for support tanks. Your primary task is to destroy your enemy in the same place on the opposite side of the map (red circle) and tanks advancing in the bottom-right corner of the map. Keep an eye out on the forest near the central hill.
Obvious choice for support tanks. Your primary task is to destroy your enemy in the same place on the opposite side of the map (green circle) and tanks advancing in the bottom-right corner of the map. Keep an eye out on the forest near the central hill.
As a light or medium tank, this is your race line. The team that takes this spot controls the battles raging below. Tons of bushes, hard cover, and height advantage — it’s hard to get you out of here. Make sure your camouflage value and view range suffice to detect whoever tries to climb the hill. Your artillery and support will make short work of them.
Move on to this ledge after you make sure the hillside is clear of enemies. From here you can support your allies in the valley and contest the small hill with the windmill on it. This ledge gains importance after a few minutes pass; let the front lines settle down before moving here.
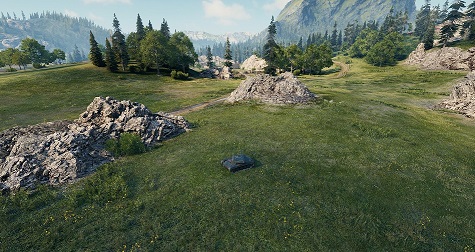
We advise against taking cover behind the rock formation by the edge of the map, since you are completely exposed to enemy artillery fire here. Use the rocks situated just nearby.
The valley of fire and heavy steel. As a front-line heavy tank or assault destroyer — this is where you can use your heavy armour. Approach the valley by hugging the hill first (sectors H9-J9) but try to push further down the valley. If you reach the middle part of it, you will be completely protected from the enemy above you. Make sure to take care of the corner (K0) before advancing towards enemy base.
Use these bits of cover to support your allies trying to claim the hillside in sector K0. Only if you control it can you move on to fire at enemies in the valley. As soon as you peek out, you are guaranteed to be spotted here, making you an easy target for anyone on the hillside in K0.