Tank of the Month: The Marder II

World War II changed the warfare forever. After the Great War which saw years of attrition warfare, a completely new element had appeared: Tanks. And when tanks entered the war scene, people started looking for different ways to dispose the enemy machines. One of the answers were Tank Destroyers.
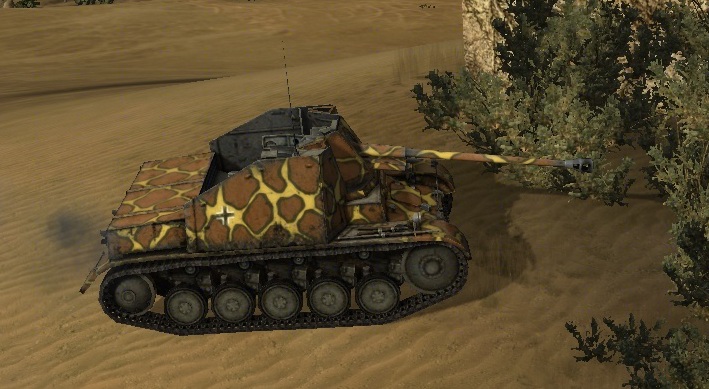
Today we would like to look closer to one of the early models deployed by the German Army: Marder II.
This German tank destroyer of World War II was based on the Panzer II chassis. One of the main advantages of this machine was its good mobility and ability to cross terrain (the engine had about 140hp but it could run over almost anything. The max speed was about 50km/h, power/weight ratio was about 12-13hp per tonne). There were two main version of this vehicle.
SdKfz 132 was based on panzer II Ausf. D and E or Flammenpanzer II. The machine was armed with the captured soviet 7.62 cm F-22 Model 1936 gun (German designation 7.6 cm PaK 36(r)), rechambered to the fire German Pak40 cartridge, which increased its penetration ability. About 201 tanks were converted into this variant.
SdKfz 131 was based on the retired Panzer II Ausf. A, B, C and the newly produced Ausf. F. It was armed with German 75mm PaK 40 gun. The machine had a wider fighting compartment and a slightly lower silhouette. The total number of 651 tanks had been produced/converted.
Marders proved to be good. Although it had poor armour, lacked protection against artillery fire (open rear and top) and poor (very high) silhouette, its main purposes were ambushes, and defensive actions, in which they were very effective. Marder II was used between 1941 and 1944.
Now let’s look at the in-game tank.
Marder II Tips, Tricks and Tactics
Let’s start with the main disadvantages of Marder II:
- Light armor
- Open-topped
- No turret
That’s it!
Now, let’s have a look at its benefits:
- Maneuverability
- Wide gun traverse angle
- Great gun (7.6 cm PaK 36(r))
- Superb view range (460 m)
But the numbers written in documentation are not telling us everything. In order to fully appreciate the benefits of this little killer you will need to try it in the game. Here are a few tactical options to unleash its full potential.
Camouflage
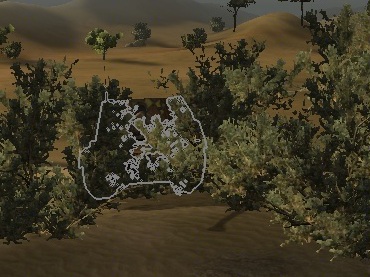
Marder itself is pretty small and thus has a relatively high camo value. You can improve it by training your crew for camouflage or mounting a camouflage net. With this equipment, you can stay safely hidden behind dense bushes relying on your teammates to spot every enemy tank for you.

View range
View range of 460 m. is, at Tier III, rather exceptional and if you combine this with other optical devices, you can act as a very good scout. In this tank destroyer you can fully utilize the benefits of the binocular telescope. However if you will take part in a high-tier battle you can bring your team a significant benefit without even firing the gun.

Gun
With an average penetration of 118 mm, Marder II is able to punch through most of tanks armor. While some Tier Vs and Vis can resist a frontal attack none of them are able to survive a backside fire. Accuracy could be much improved, but you can still hit from a long distance with your fast aiming time option.
Basic tactics
There are many ways to play Marder II. However, there are some basic tactics you should follow before you will develop your own style:
At the beginning of the battle, select your position carefully – regardless of your position on the team’s ladder, you should find a place where you won’t be fully visible for your enemies(i.e. bushes). However you should always have a good view on the battlefield.

Once there, fade into the scenery. Spot rushing enemies, but consider carefully your shots. Please note that any tank you will meet on your way has a significantly shorter view range compared to yours – so try to keep enemies at a distance. If they come too close, your position should offer a fall back route to take cover. Ideally, you should also have some light or medium tanks around in case you will be circled by the enemy light tanks.
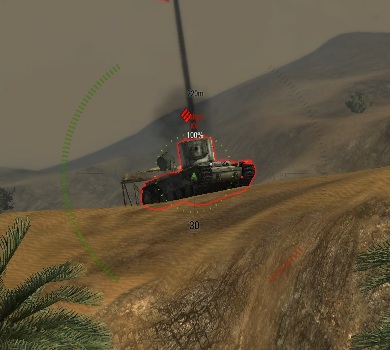
Once some faster enemies have been eliminated, you can start hunting for the main force – usually heavy tanks. Remember that visibility is your huge advantage. In contrast with the KV-2s which only have a very low view range so they can be easily destroyed. Just try to hit their side armor and the KVs will be completely defeated.
When the enemy main force is destroyed, you can switch to another role: Assault gun. While Marder is lightly armored, it can be relatively fast and agile, with a quick and wide hull traverse allowing you a limited dogfighting. If you feel like accepting the challenge, you may even take the lead of your team’s assault, using your superior view range to detect hidden enemies. If you want to play it safe, you can go in the 2nd wave, providing fire support to the frontline tanks.
Please remember that you're extremely vulnerable to enemy fire – do not take unnecessary risks and avoid direct confrontation wherever it’s possible.
Good hunting!

