- Germany
- U.S.A.
- U.S.S.R.
- France
- U.K.
- China
- Poland
- Sweden
- Germany
- U.S.A.
- U.S.S.R.
- France
- U.K.
- China
- Poland
- Sweden
- Destruction Ranch
- Warm-Up
- Skilled Hunter
- Power of the Pack
- Good Chance Comes at Once
- Liquidator
- Veni, Vidi, Vici
Welcome to Steel Hunter, one of the most exciting modes in World of Tanks. In this last-man-standing battle royale, you or your Platoon will fight in special vehicles on dynamic maps. In the latest version of this mode, we have added several new mechanics and features to the existing rules, aiming to make the game even more dynamic while remaining comfortable for both beginners and veterans.
To enter the game, select the appropriate option (Solo, Random Platoon, or Regular Platoon) by clicking the event banner under the Battle! button.

If you choose to play in a Random Platoon, the game will find you a teammate with the most suitable skill level to match your own Steel Hunter statistics.
If finding a Platoon partner takes longer than usual, the skill requirements may be relaxed.
You can also offer to convert your Random Platoon into a Regular one. This option is available on the battle results screen.
To use this feature in the game, you need to do the following:
Voice chat works for both Random and Regular Platoons.
If you are in a Regular Platoon, then you can also use the voice chat in the Garage.
This feature is designed to improve communication with your Platoon mates in case you are unable to use the voice chat. Press the default Z key to activate it.
All eight special vehicles available in Steel Hunter: Evolution have different tactics, gameplay, and Combat Abilities. Each of them can be upgraded from Tier I to Tier VII while in the heat of battle.
Each vehicle has one regular and one ultimate Combat Ability unique to it:


Additionally, there are two Combat Abilities that are common for all vehicles:
 |
Recovery: Gradually restores a fixed percentage of the vehicle’s HP, but stops working if you take damage. |
 |
Repair Kit: Repairs vehicle modules (like Large Repair Kits) and reduces stun duration. |
To upgrade your vehicle, you need to earn Combat XP by picking up loot and causing damage to enemies. Don't forget that you can also choose Marauders as your opponents. They make for easier prey than real players.
Each vehicle has different modules available, and at each tier you will have a choice of two options.
Go wild and choose the configuration that best suits your play style!


Crew members are exclusive to the vehicle they come in and can’t be dismissed, injured, or sent to the Barracks. They do not earn Crew XP. Also, the commander of each vehicle has access to the following set of skills and abilities:
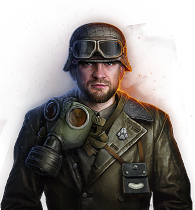
![]() Designated Target
Designated Target![]() Intuition
Intuition
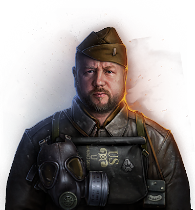
![]() Smooth Ride
Smooth Ride![]() Snap Shot
Snap Shot
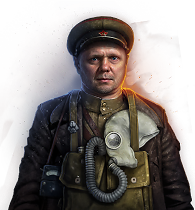
![]() Designated Target
Designated Target![]() Intuition
Intuition
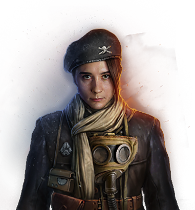
![]() Deadeye
Deadeye![]() Eagle Eye
Eagle Eye
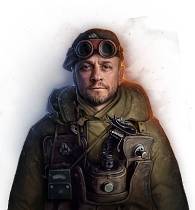
![]() Smooth Ride
Smooth Ride![]() Snap Shot
Snap Shot
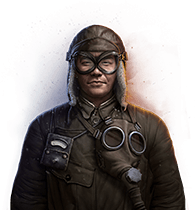
![]() Deadeye
Deadeye![]() Eagle Eye
Eagle Eye
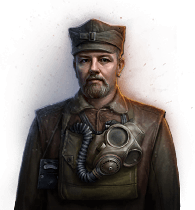
![]() Smooth Ride
Smooth Ride![]() Snap Shot
Snap Shot
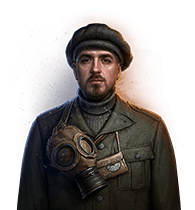
![]() Designated Target
Designated Target![]() Intuition
Intuition
The hunting will take place on three maps—Dreamland, Arzagir 4.04, and Firnulfir. Each of them has a different setting and unique game atmosphere. The scale of the battlefield is way bigger than in Random Battles.
Dreamland is a dangerous abandoned town with plenty of space to hide. Arzagir 4.04 is a vast desert laced with sand dunes and dried-out rivers. Firnulfir is a picturesque Scandinavian tundra that will enchant you with its northern landscapes, frozen ponds, and small abandoned settlements.
 Minimap: Dreamland Dreamland
 Minimap: Arzagir 4.04 Arzagir 4.04
 Minimap: Firnulfir Firnulfir
All three maps shrink with time, leaving less space to play and survive. If you’re in an area that turns orange, that means it's about to become a Danger Zone and you need to leave it as soon as possible. A special countdown will indicate how much time you have before it turns into a Destruction Zone. The fewer players on the battlefield, the less time you’ll have to escape the Danger Zone. When a Danger Zone turns red, it becomes a Destruction Zone.
You will have very little time to escape from it, as shown in a countdown. Once the countdown ends, your vehicle will receive continuous damage until it is destroyed or until you have left the Destruction Zone. But don't worry too much: the boundaries of the zones are clearly displayed, and you can easily identify each of them.

In a closed zone, your vehicle will receive continuous damage. You will have little time to leave a red zone.

In a yellow zone, your vehicle does not receive damage. But beware: A yellow zone can close at any moment. Think about your escape routes.


The most valuable type of loot. It contains a larger amount of Combat XP, restores HP, and repairs damaged modules. It also gives you one charge for all your Abilities. Remember that collecting this loot takes 5 seconds. It is marked by blue smoke.


Another Hunter entered your view range! Note: Enemy vehicles and loot points become visible only when they are within your view range.

AI-driven enemy models that are weaker opponents than real players. Destroy them to get additional Combat XP and loot. There are three different types of Marauders: Hares, Wolves, and Bears.


The most valuable type of loot. It contains a larger amount of Combat XP, restores HP, and repairs damaged modules. It also gives you one charge for all your Abilities. Remember that collecting this loot takes 5 seconds. It is marked by blue smoke.


A Hunter you spotted with Radio Detection. Be aware that using Radio Detection will reveal your current position on the minimap at the time of activation to all players within Radio Detection range of your position.


Restores HP and contains Combat XP and shells. Also provides one Recovery charge with a certain drop chance. It is marked by green smoke.


Repairs damaged modules and contains Combat XP (but less than in Consumables). Also gives you a Repair Kit or one Ability charge. It is marked by yellow smoke.


Repairs damaged modules and contains Combat XP (but less than in Consumables). Also gives you a Repair Kit or one Ability charge. It is marked by yellow smoke.


Restores HP and contains Combat XP and shells. Also provides one Recovery charge with a certain drop chance. It is marked by green smoke.


Contains half of the resources of a destroyed vehicle, repairs damaged modules, and restores some of your HP. Collecting this loot only takes 2 seconds, but when you do, all players will be able to see Spoils of War on their minimaps. It is marked by red smoke.


A Hunter you spotted with Radio Detection. Be aware that using Radio Detection will reveal your current position on the minimap at the time of activation to all players within Radio Detection range of your position.


A Hunter you spotted with Radio Detection. Be aware that using Radio Detection will reveal your current position on the minimap at the time of activation to all players within Radio Detection range of your position.


You can upgrade your vehicle with the help of special loot that contains Combat XP, shells, charges for your Combat Abilities, and more. You can pick up two or more loots at the same time. There are four types of loot available, as follows:
|
Consumables Restores hit points and contains a Recovery charge, ammo, and experience for improving your vehicle. |
Supplies Repairs damaged modules. Also contains Combat XP, but less than Consumables. Can contain either a Repair Kit or one Combat Ability charge. |
Spoils of War After destroying an enemy, you can pick up half of their Combat Ability charges, restore hit points, and repair your vehicle's damaged modules, as well as receive experience and ammo. Reduces your abilities' cooldowns. Can contain one Combat Ability charge. |
Airdrop If you get your hands on an Airdrop, you will get a Respawn charge—and a huge advantage over your opponents. This is the most valuable drop. It restores modules and vehicle hit points, and it also provides ammo, experience, and charges for all Combat Abilities. |
You can pick up two or more loots at the same time.

In the early stages of battle, you have a chance to take revenge on your opponents. When playing solo, you’ll be able to automatically respawn in a safe location after your vehicle’s destruction—but only during the first 5 minutes of the battle.
Platoon players will have two respawns per Platoon. You will be able to respawn next to your Platoon mate within the first 8 minutes, but to do so, your ally must remain out of battle for 10 seconds.
When you respawn, the following happens:

Steel Hunter: Evolution features AI-driven enemy models—Marauders—that are weaker opponents than real players. When they spawn at certain points on the map, destroy them to get additional Combat XP and loot.
There are three different types of Marauders that demonstrate individual behaviors and react differently to your presence:
Destroying the more powerful Marauders will bring you more valuable rewards. As you advance through battle, you'll encounter more Bears and fewer Wolves and Hares.

In Steel Hunter, your experience and individual mastery have always been your main advantages. But in the battle royale format—where only the best wins—it may be challenging for new players to compete with more experienced Hunters.
To make the gameplay fairer for both newcomers and veterans, we are using special matchmaking rules. These rules will take your performance in the mode into account and help the game to try and find opponents close to your battle results. The rules apply both when playing solo and as part of a Platoon.
The vision system uses Vision Cones. Here’s how it works:

Steel Hunter features a Progression system comprising successive Stages. The Progression Stages are completed with Progression Points![]() you earn In Steel Hunter battles and for completing special missions in the mode. Based on your performance, battles also yield credits, Battle Pass Points, and Steel Seals which can be exchanged for customization items.
you earn In Steel Hunter battles and for completing special missions in the mode. Based on your performance, battles also yield credits, Battle Pass Points, and Steel Seals which can be exchanged for customization items.
| SOLO | PLATOON | ||
|---|---|---|---|
| Position | Reward | Position | Reward |
| 1 | 25 |
1 | 25 |
| 2–4 | 15 |
2–3 | 15 |
| 5–7 | 10 |
4–5 | 10 |
| 8–11 | 5 |
6–8 | 5 |
| 12–15 | 1 |
9–10 | 1 |
If you leave a battle before it ends, you won't receive any rewards and won't progress through missions.
Completing missions will reward you with Progression Points, as well as a number of other valuable items.
Destroying Marauders won't help you progress through these missions.
Conditions:
Reward:
Conditions:
Reward:
Conditions:
Reward:
Conditions:
Reward:
You can continue completing special missions after you max out the mode Progression to score more Steel Seals and bonds.
Conditions:
Reward:
Conditions:
Reward:
Conditions:
Reward:
Steel Hunter will also bring you Battle Pass Points. The number of Points awarded depends on your rank in the post-battle statistics. There is no Point Limit for vehicles in Steel Hunter. To learn more about Battle Pass, refer to our dedicated guide.
| SOLO | PLATOON | ||
|---|---|---|---|
| Position | Reward | Position | Reward |
| 1 | 10 |
1 | 10 |
| 2–6 | 8 |
2–4 | 8 |
| 7–10 | 6 |
5–7 | 6 |
Steel Hunter also has a permanent bonus to credits and Combat XP from WoT Premium Account and allows you to earn 50% more Steel Seals. Additionally, you can now take advantage of:
Here you can exchange your Steel Seals for unique vehicle customization items. The Shop is available from the beginning of the event and for some time after its completion.
You can track your battle effectiveness in Steel Hunter via the Service Record → Statistics tab in your Garage. Select Steel Hunter from the dropdown menu of available game modes to see the number of vehicles you have destroyed, as well as your average damage per battle, number of wins, and other stats.

Steel Hunter requires more system resources than regular Random Battles. This is due to several key factors that are specifically related to the mode, including the large map sizes and the significant number of objects on them.
Players with low RAM may experience some performance issues while running the mode. To avoid any problems and ensure you play with maximum comfort, change the graphics settings of your game client in accordance with the capabilities of your CPU and graphics card.